


Hi Developer Group!
Please enjoy this installment of our Solution Recipe series, brought to you by our very own Senior Solution Architect, Olaf Dunn!
Solution Recipes are tutorials to achieve specific objectives in Klaviyo. They can also help you master Klaviyo, learn new third-party technologies, and come up with creative ideas. They are written mainly for developers & technically-advanced users.
WHAT YOU’LL LEARN:
How to build custom product blocks using the drag-and-drop editor, sourcing product data from Klaviyo product recommendations engine, and as a bonus, Google Sheets.
WHY IT MATTERS:
Klaviyo product blocks provide the ability to quickly add products to an email. However, they can be limiting in many use cases as the standard block is not extensible. This solution provides email marketers with the ability to build custom blocks utilizing all product metadata, including brand, sale price, descriptions, any additional product images and localization data.
LEVEL OF SOPHISTICATION: Easy to Moderate
Introduction
Klaviyo offers an out-of-the-box Product Block that’s available within the Klaviyo email editor. While this is a fantastic way to add product data to an email, it is limited to the following product fields:
- Name
- Price
- Main Image
- Link
Additionally, the product block is limited to styling edits only - layout changes are not possible.
Many retailers would like to extend this product block functionality to make use of additional product metadata that maybe passed into the product catalog. Commonly, these include:
- Sale price
- Brand
- Description
- Additional product images
- Product translations
This solution will show how you can build custom product blocks utilizing Klaviyo’s AI-driven product recommendation feeds. As a bonus, this guide will also show how to hook up your product block with a Google Sheet to provide a source for manually-created product feeds.
Challenge
Traditionally, customization of the products would require a custom product block where advanced CSS and HTML knowledge is required. This option is still available for marketers who wish to retain full control of the HTML/CSS (see guide here)
This article will show how email marketers can build the custom product block using the drag and drop elements only, with no HTML or CSS knowledge required.
Ingredients
- Product Catalog
- Product Feeds configured
BONUS Requirements:
- Napkin.io Account
- Google Sheets
Instructions
1. Create a product feed
Product feeds take in data from your product catalog and customer behavior (e.g., the products they’ve viewed or purchased in the past) and use this information to provide custom product recommendations for your subscribers. How to use product feeds and recommendations
To create a feed, simply:
- In Klaviyo, select Content in the left hand menu.
- In the dropdown, click Products.
- In the upper right, click Manage Product Feeds, then click Create Product Feed.
- Set up the conditions & rules for your product feed.
- Make a note of the product feed name your used.
Full instructions can be found here: Configure a product feed.
2. Build your custom product block
We now must add a section that repeats for every product in the recommended product feed. This section will perform a catalog lookup on the ‘item_id’ from the feed, and then provide you with the content to display to your requirements.
How to add a vertically-stacked product recommendation block
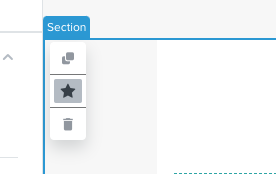
Drag in a section block:

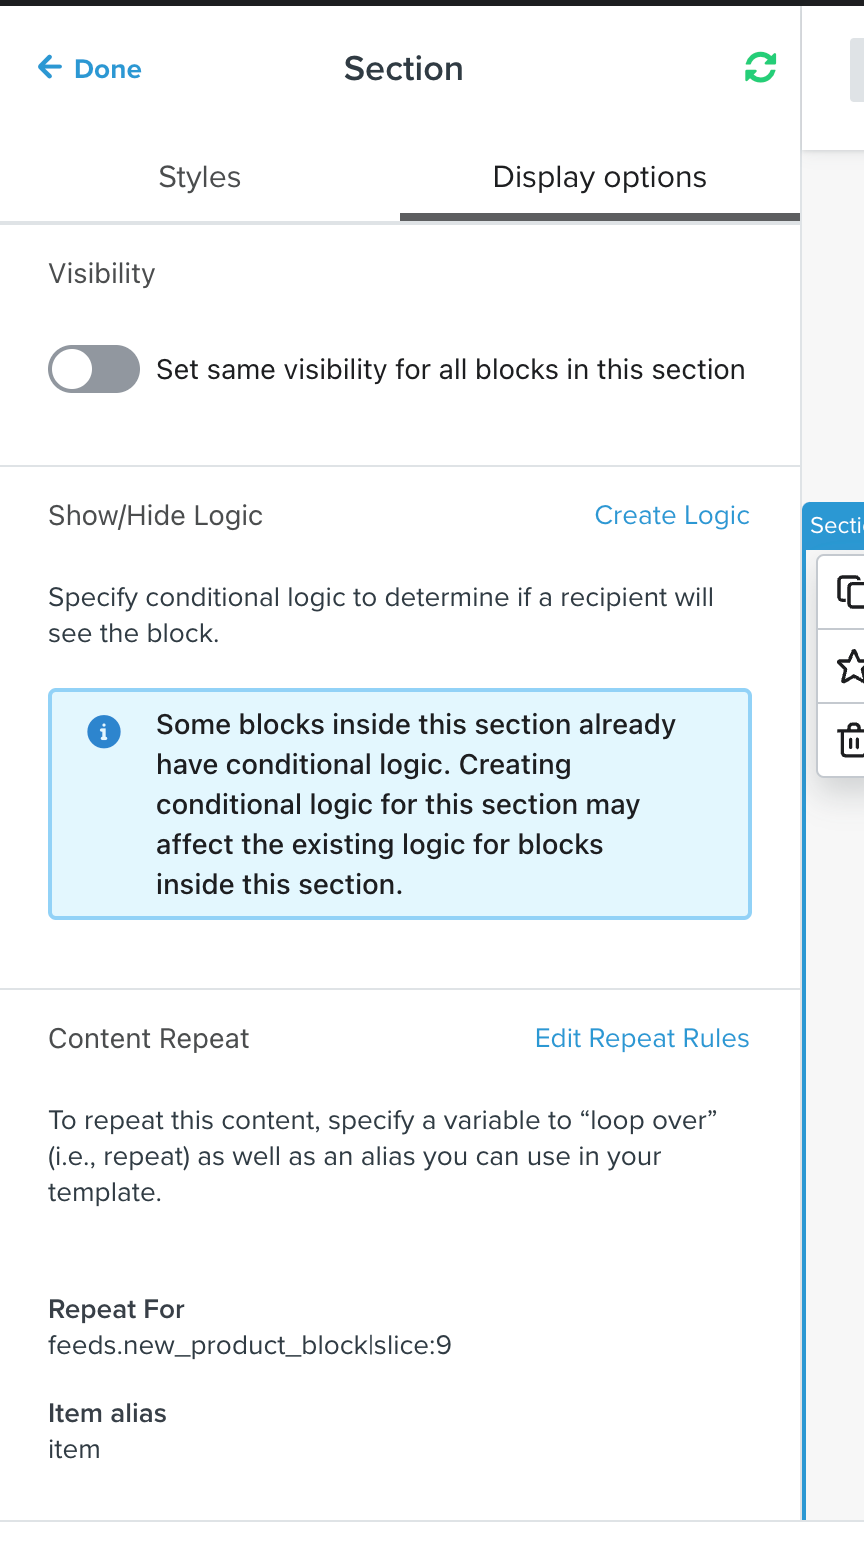
Click on display conditions and set the repeating region to use ‘feeds.ProductFeedName|slice:3’ (replacing ‘ProductFeedName’ with the name of your product feed defined in step 1, and the number ‘3’ with the number of products you wish to pull from the feed), and set it ‘as item’:

To ensure that we ‘load’ the feed into the template, we must add a product block to the template. This will then provide us with access to the product feed for our custom product block. We will then hide this product block so that it does not show.
Drag a product item into the top of the section:
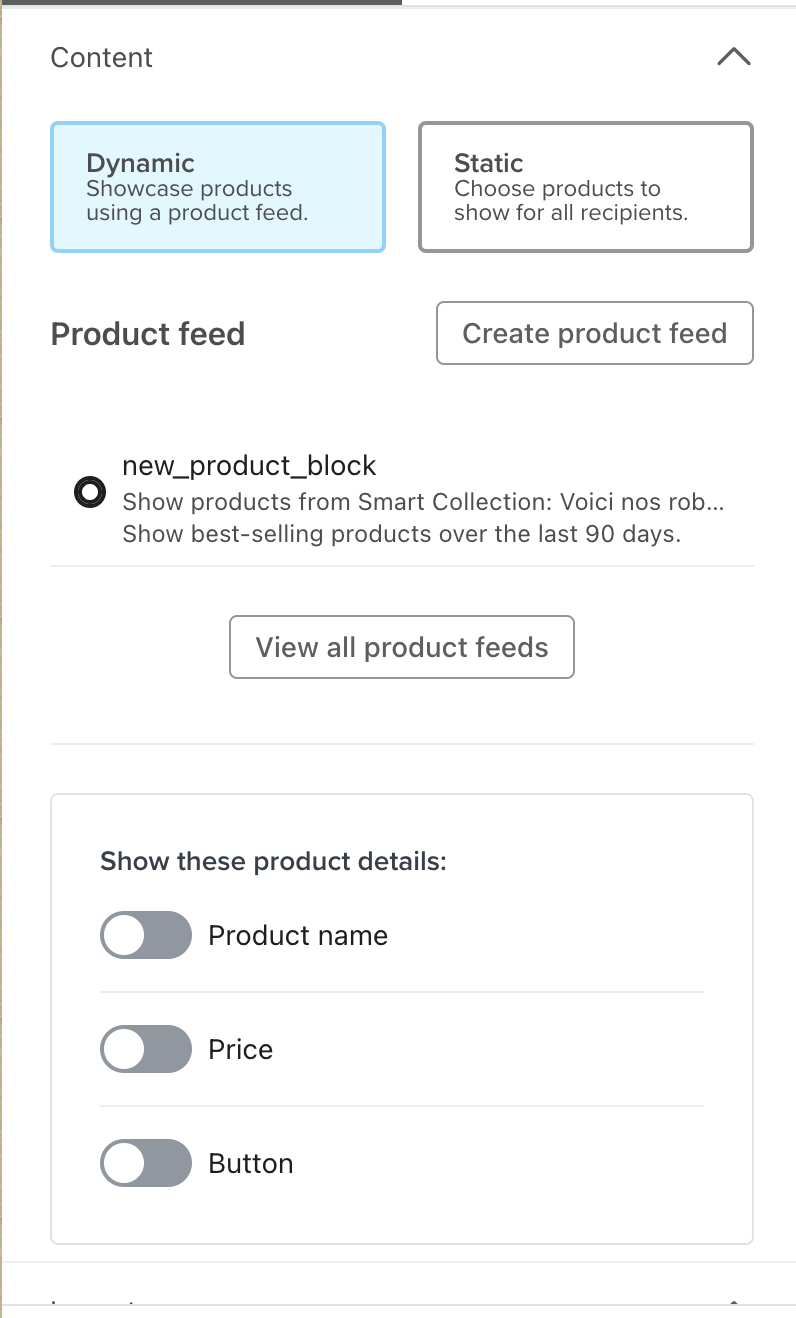
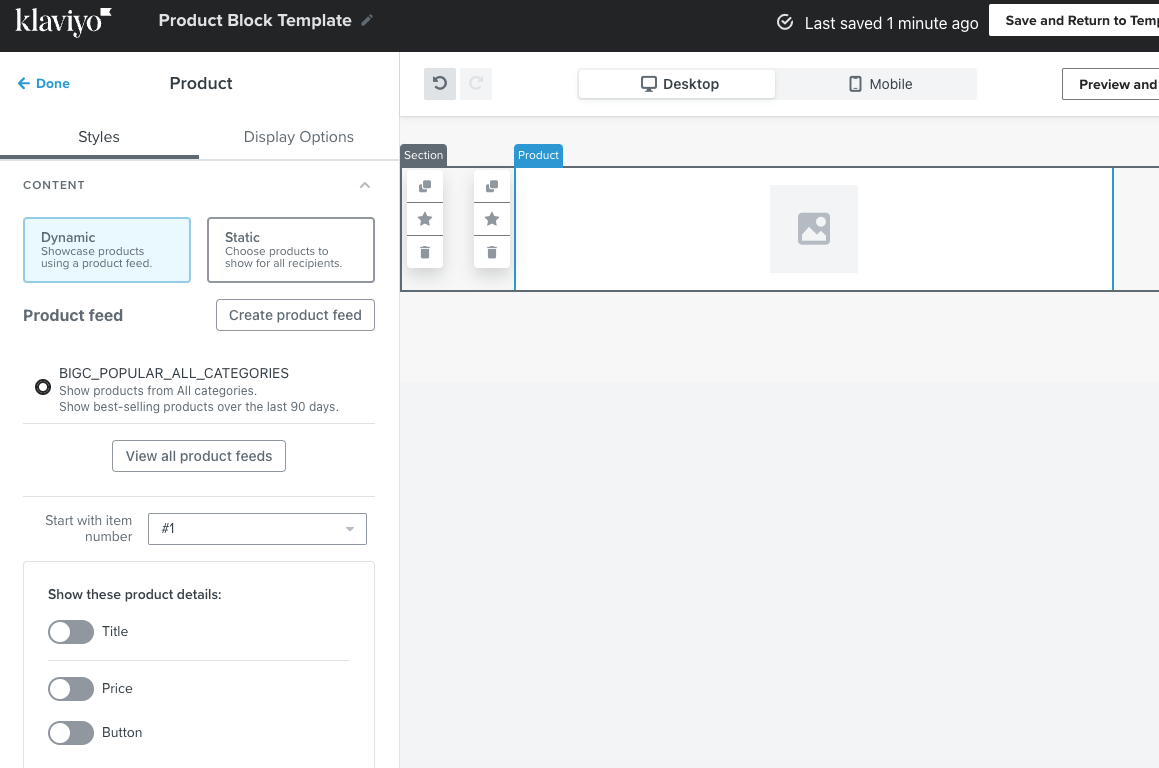
Configure the product to use a ‘Dynamic’ source, and select the product feed you have created. Also, disable all fields and choose to display only one product. It should look similar to this:
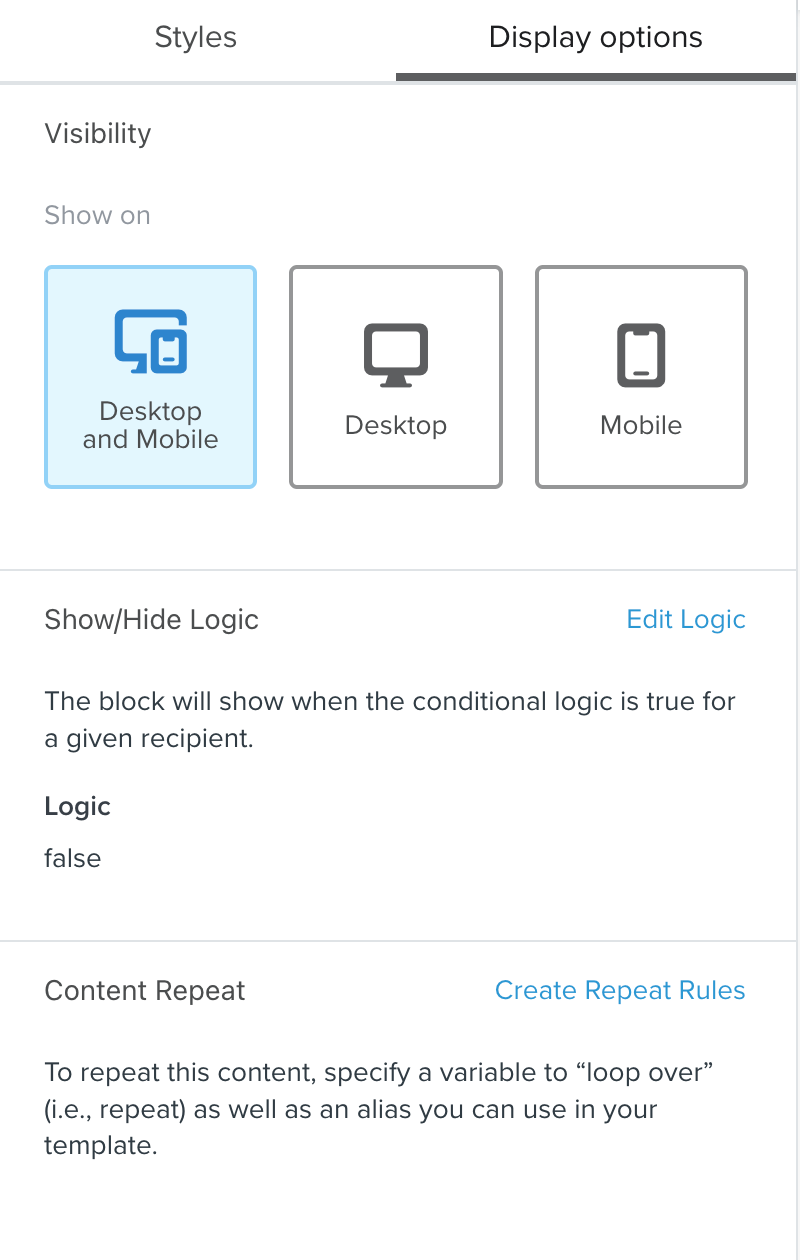
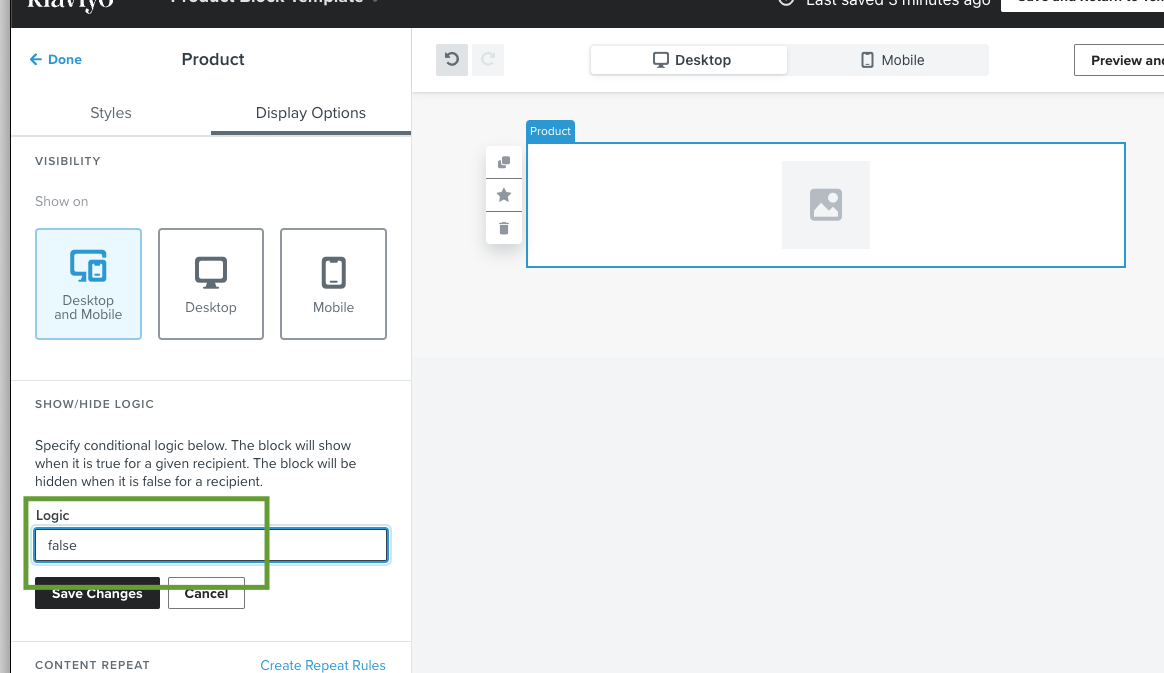
Now select ‘Display Options’, and in the display conditions, set the value to ‘false’:
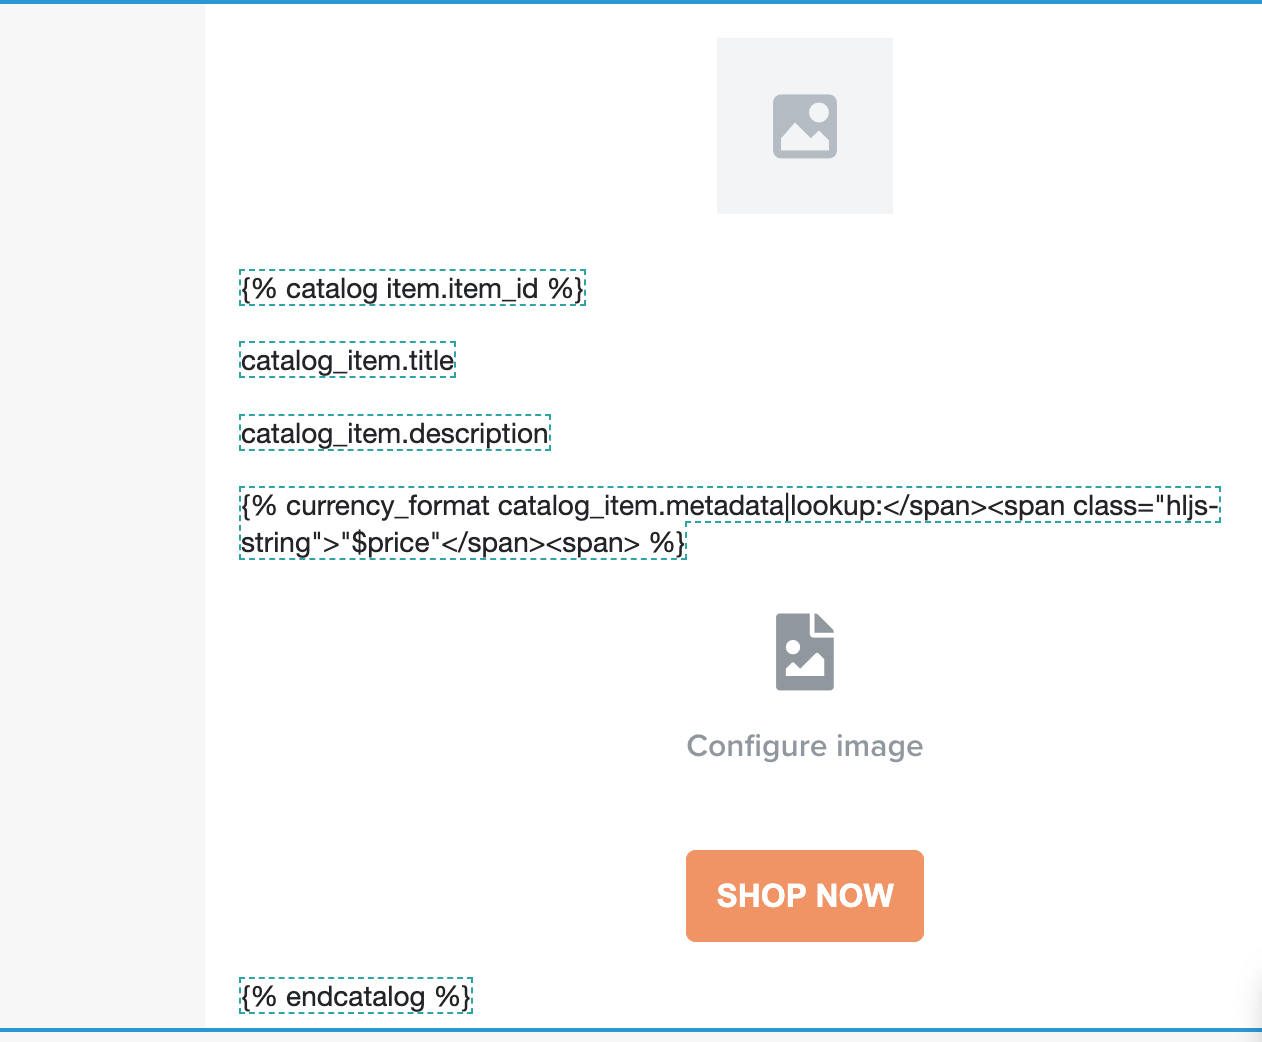
Next we need to perform a catalog lookup so that we can pull the catalog content from the current item in the feed. Drag a text block into the section and add the catalog lookup based upon the item that we’re looping over from the repeating section. In this case, we set this to ‘item’ and the value of ‘item_id’:
{% catalog item.item_id %}Add another text block under this one, this time closing the catalog lookup with:
{% endcatalog %}The resulting template will look like this:
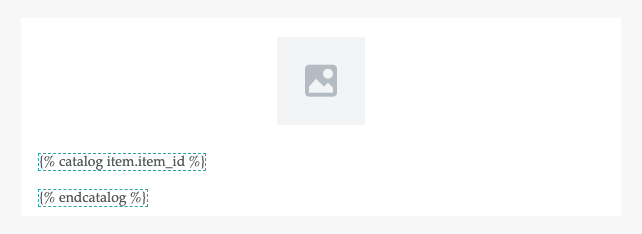
Now you can build your custom product block using the Klaviyo content blocks. Simply drag elements between these two blocks and utilise the catalog_item values.
The standard catalog_item values can be found here: Catalog lookup reference
For example:
To add an image, drag the image block, click on ‘Dynamic URL’, and add:
{{ catalog_item.featured_image.thumbnail.src }}
To add text, drag a text field and add content such as the product title, description and price:
{{ catalog_item.title }}{{ catalog_item.description }}{% currency_format catalog_item.metadata|lookup:"$price" %}
You are then able to use the editor to style these values as required.
To add a ‘Shop Now’ button, drop in the button block, and add the following as the URL:
{{ catalog_item.url }}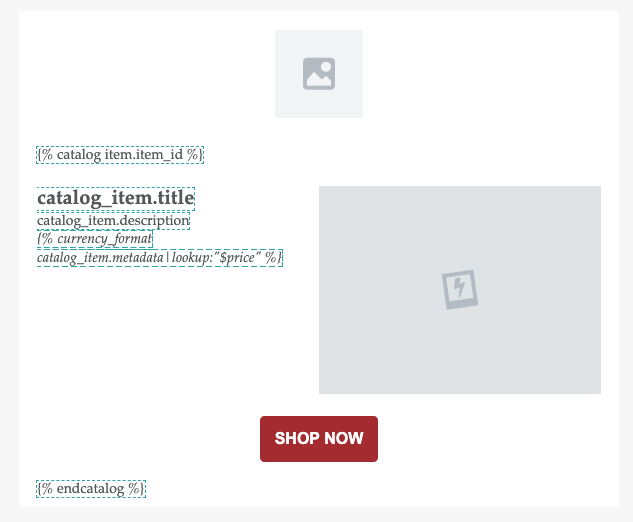
You can also use any custom catalog attributes. These can all be found within the ‘catalog_item.metadata’ object.
Once you’re happy with the block, you can now save it as a ‘Universal Content Block’. This will allow you to drop the content block into any email within a flow or campaign:
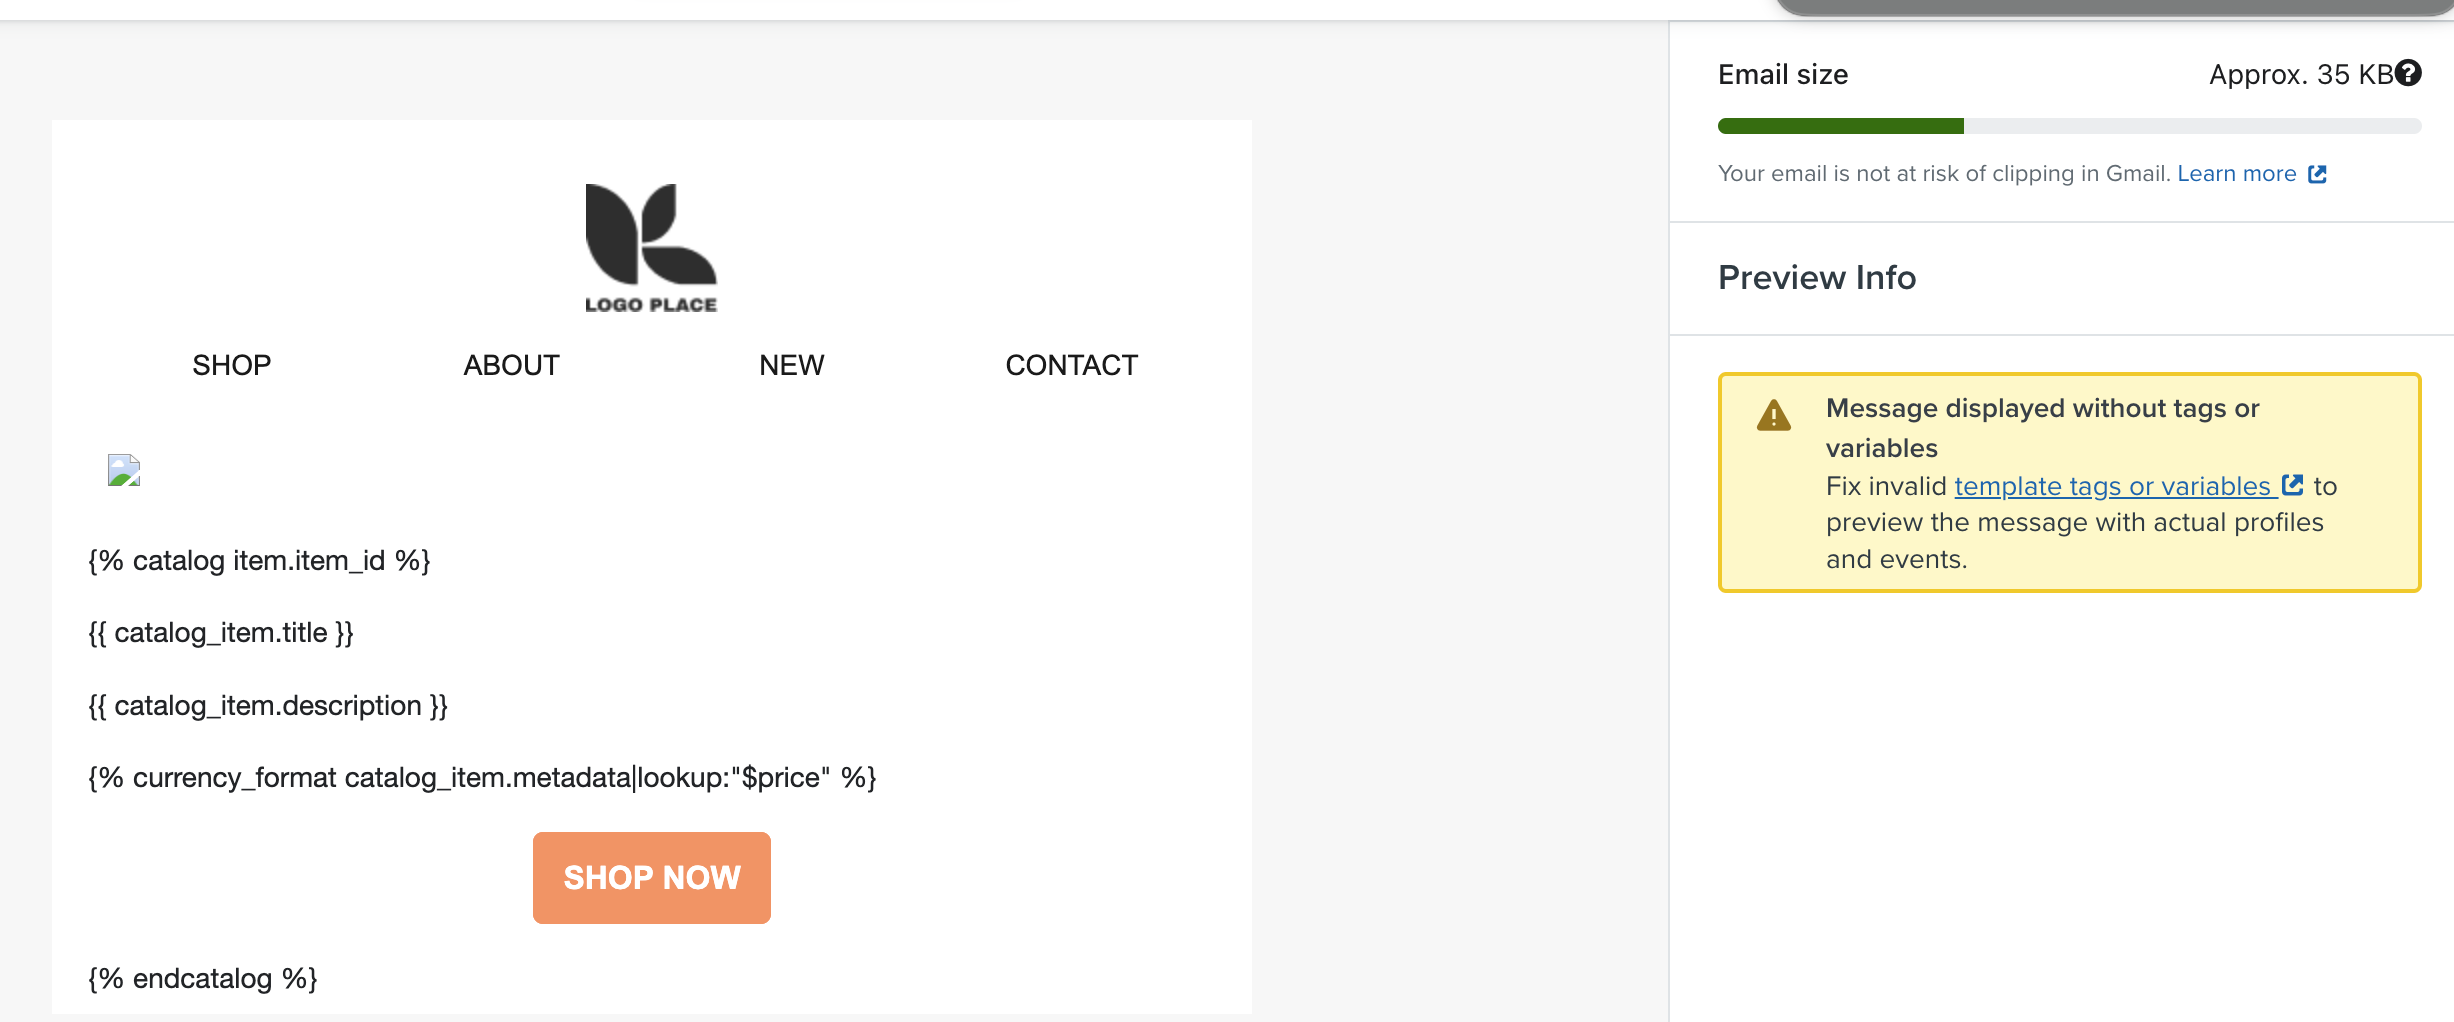
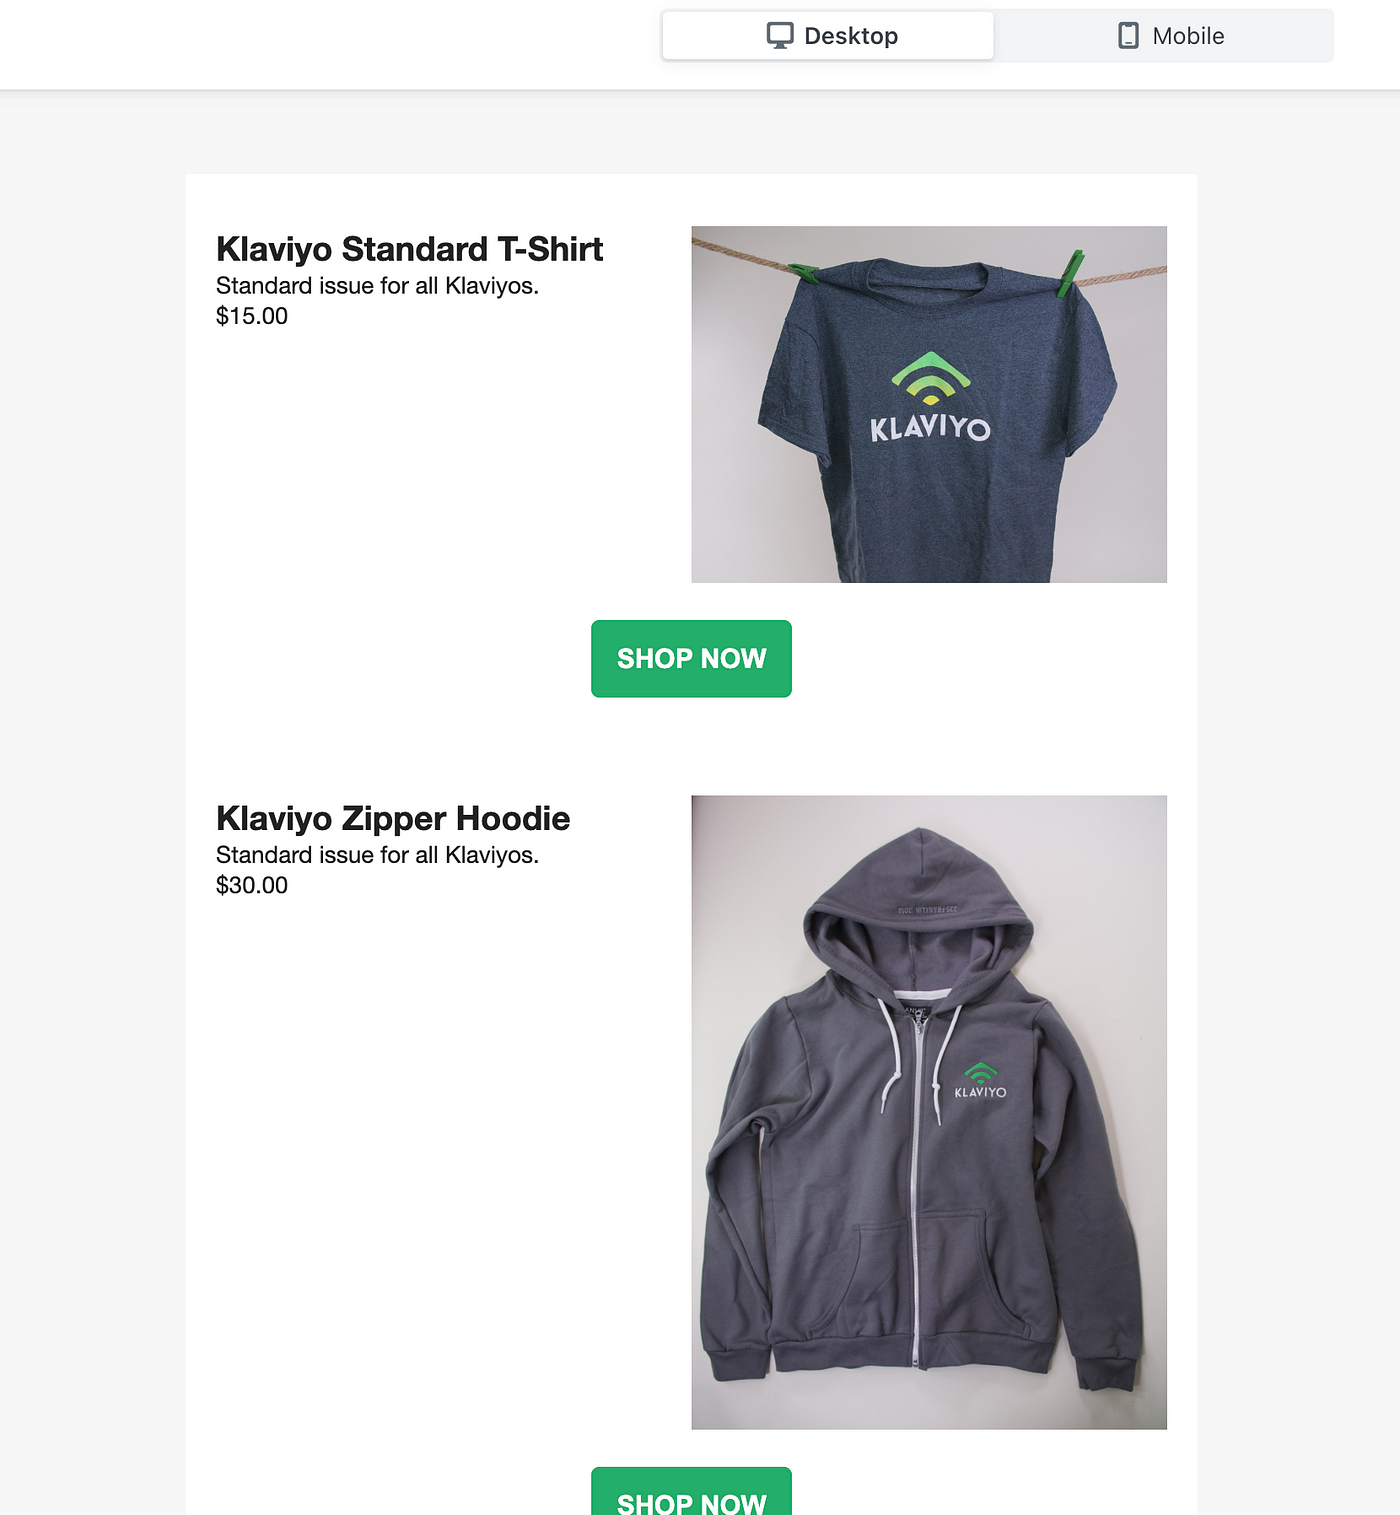
Now, to preview. The result should be similar to this:
How to add a column based product recommendation block
Drag in a section block:
To ensure that we ‘load’ the feed into the template, we must add a product block to the template. This will then provide us with access to the product feed for our custom product block. We will then hide this product block so that it does not show.
Drag a product item into the top of the section:
Configure the product to use a ‘Dynamic’ source, and select the product feed you have created. Also, disable all fields and choose to display only one product. It should look similar to this:
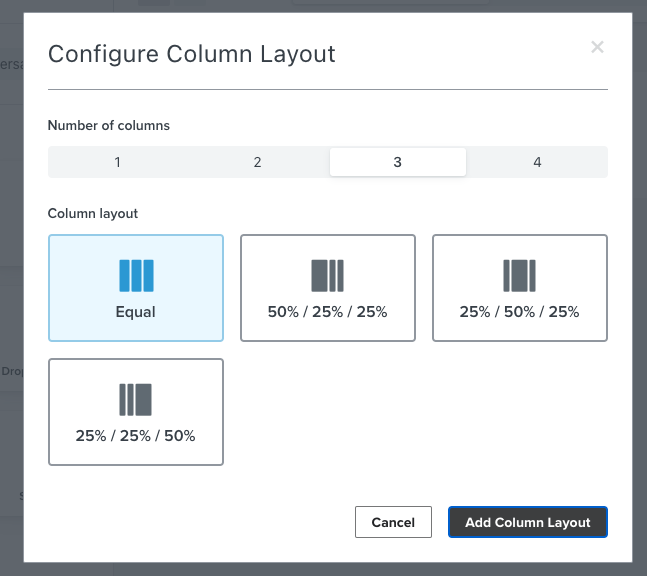
Next, we create the columns we wish to use. Simply drag the columns block into the section below the product block, and select the style & number of columns you wish to use:
As the number of columns is not dynamic, we will need to call the product item directly for each column.
To achieve this, we need to perform a catalog lookup so that we can pull the catalog content from the current item in the feed. Drag a text block into the first column and add the catalog lookup based upon the first item (index of 0) in the feed, and pull the item_id:
{% catalog feeds.ProductFeedName.0.item_id %}
Add another text block under this one, this time closing the catalog lookup with:
{% endcatalog %}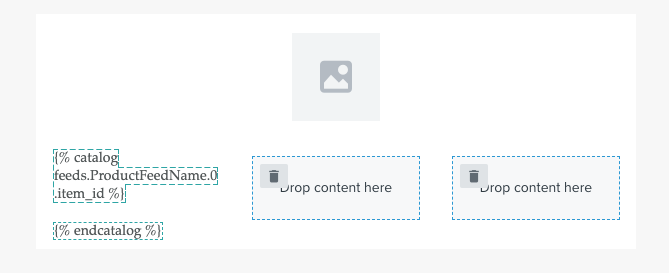
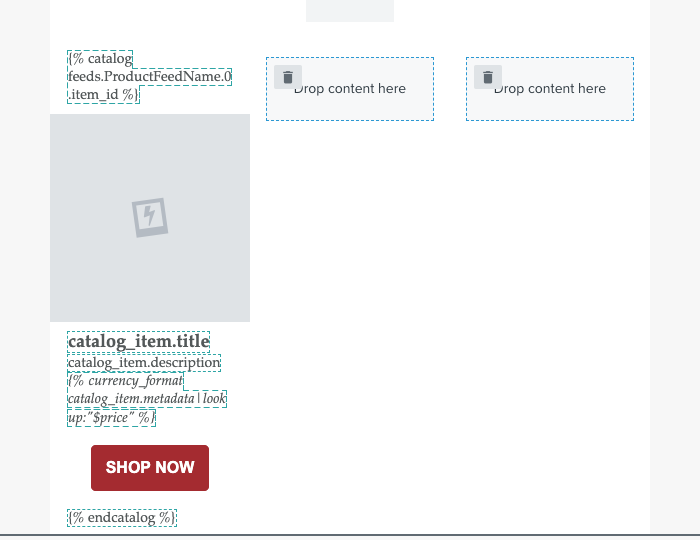
Now, you can build your custom product block using the Klaviyo content blocks. Simply drag elements between these two blocks and utilise the catalog_item values.
The standard catalog_item values can be found here: Catalog lookup reference
For example:
To add an image, drag the image block, click on ‘Dynamic URL’, and add:
{{ catalog_item.featured_image.thumbnail.src }}
To add text, drag a text field and add content such as the product title, description and price:
{{ catalog_item.title }}{{ catalog_item.description }}{% currency_format catalog_item.metadata|lookup:"$price" %}
Bonus: Sale price strikethrough
The below script is an example of how you can show a sale price with a strike through the old one:
{% if catalog_item.metadata|lookup:"compare_at_price" != None %}<s>{% currency_format catalog_item.metadata|lookup:"compare_at_price" %}</s> {% currency_format catalog_item.metadata|lookup:"$price" %}{% else %}{% currency_format catalog_item.metadata|lookup:"$price" %} {% endif %}
You are then able to use the editor to style these values as required. To add a ‘Shop Now’ button, drop in the button block, and add the following as the URL:
{{ catalog_item.url }}
Once you’re happy with the column, you can now duplicate each block in this column, and drag them in the same order into the remaining columns. In each subsequent column, you will need to change the item index in the catalog lookup, for example, the first three items will be using the following:
{% catalog feeds.ProductFeedName.0.item_id %}{% catalog feeds.ProductFeedName.1.item_id %}{% catalog feeds.ProductFeedName.2.item_id %}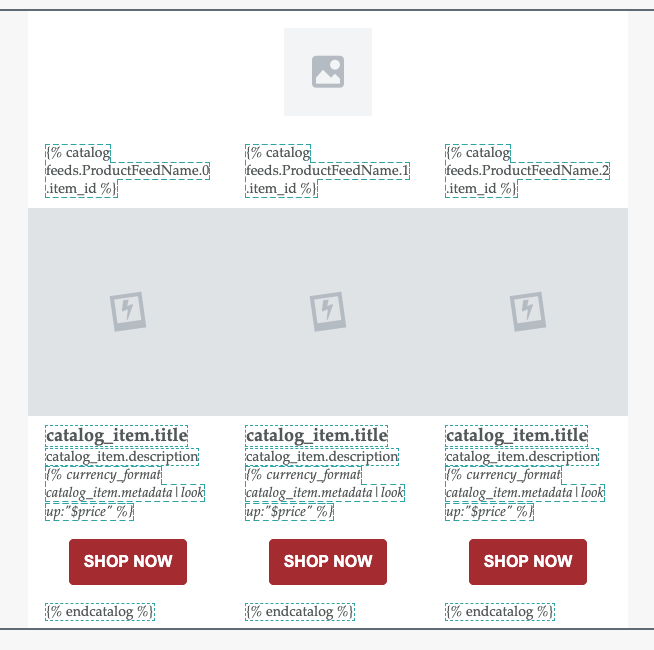
Once you’re happy with all the columns, you can now save as a ‘Universal Content Block’. This will allow you to drop the content block into any email within a flow or campaign:
Bonus
The previous section described how to use a custom product block with product recommendations, but what about manually-curated products?
This section will dive into how you can use a Google Sheet to manage your product curations, and feed this automatically into your Klaviyo product blocks - ready for any campaign or flow. This will require you to set up a Google Sheet and a Napkin.io account, which will send the data from Google Sheets to Klaviyo.
1. Create a Recommendations Google Sheet
The first step is to create a Google Sheet where you will manage the product recommendations.
This is a simple single-column layout, with a single header: “recommendation”:
Each row after the ‘recommendation’ header will contain the Product ID of the product you wish to recommend. This Product ID needs to match the Product ID of the product within the Klaviyo catalog.
Make a note of the Sheet ID, which can be found in the URL of the sheet as follows. The ID in this example is 1bNFRWoRvQwsuhduHHiuaqvfTQw3FHck9jXeVmzng:
https://docs.google.com/spreadsheets/d/1bNFRWoRvQwsuhduHHiuaqvfTQw3FHck9jXeVmzng/edit
2. Generate a Google Service Account
To pull the data from the Google Sheet, we need to convert it to a JSON file. Google does not offer this functionality natively, and so we will need to use Napkin.io to connect to the Google Sheet, and convert to JSON.
A Google Service Account is used to allow API access to your Google Sheet. After creating a service account, you will need to download the JSON file. Instructions for this can be found here:
https://cloud.google.com/iam/docs/keys-create-delete#iam-service-account-keys-create-console
Rename the file: service_account.json
Once you have created the key, you will be provided a Service Account email address, for example:
klaviyo-napkin@molten-topic-368815.iam.gserviceaccount.com
You can also find this within the JSON file:
"client_email": "klaviyo-napkin@molten-topic-368815.iam.gserviceaccount.com"
Finally, you will need to share your Google Sheet with this email address so that it can access its content.
3. Setup Napkin.io to create a JSON feed
Napkin will now read from this Google Sheet and provide a JSON feed that Klaviyo can read from.
Firstly, create a napkin.io account.
Next, create a new Napkin function. In this example, we will choose ‘Blank Javascript Function’:
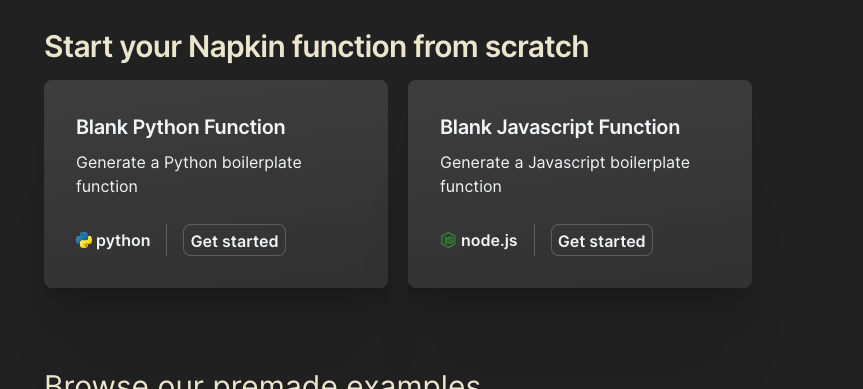
Copy the following script into your blank Napkin:
/*** @param {NapkinRequest} req* @param {NapkinResponse} res*/import { GoogleSpreadsheet } from 'google-spreadsheet'import fs from 'fs'const getGoogleData = async(sheetId) => { //Use Google Service Account to create API connections to Google Sheet const credsFilePath = '/opt/files/service_account.json' const creds = await fs.promises.readFile(credsFilePath, 'utf8') const doc = new GoogleSpreadsheet(sheetId); await doc.useServiceAccountAuth(JSON.parse(creds)); await doc.loadInfo(); const sheet = doc.sheetsByIndex[0] const rows = await sheet.getRows() const headerValues = sheet.headerValues; let json = [] for (const row of rows) { let val = {} for (const key of headerValues) { val[key]=row[key] } json.push(val) } return json}//Appexport default async (req, res) => { const { sheet_id } = req.params const rows = await getGoogleData(sheet_id) res.set({ 'content-type': 'application/json; charset=utf-8' }); res.json(rows)}Upload your JSON key to Napkin by clicking on the ‘Other’ tab at the top of your screen, and adding the file to the ‘Files’ section:

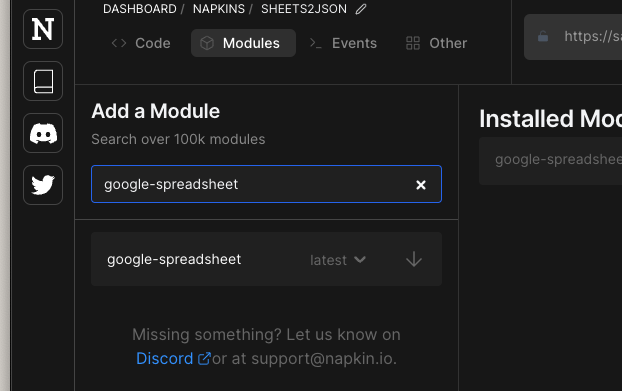
Add the ‘google-spreadsheet’ module by clicking on ‘Modules’ in the top menu, searching the NPM modules for ‘google-spreadsheet’, and clicking the download arrow:
Now we need to add a path parameter to your Napkin function. You can do this by clicking on the pencil next to your Napkin URL, and adding {sheet_id}. It should look like this:
Finally, you can now deploy this Napkin function by hitting the ‘Deploy’ button. Make a note of your Napkin function URL:
4. Setup the feed in Klaviyo
A custom web feed allows you to dynamically populate a feed of data from an external URL within a Klaviyo email. Before sending an email, Klaviyo makes an HTTP request to the URL and fetches the data. The content of the web feed is then available for use in your email. Full details on web feeds can be found here: How to add a custom web feed in an email.
Visit https://www.klaviyo.com/account#data-feeds-tab
Click on ‘Add Web Feed’:
Provide a name for the feed, for example, ‘recommendations’.
Add the Napkin URL followed by the Sheet ID, for example:
https://account.npkn.net/function_name/1bNFRWoRvQwsuhduHHiuaqvfTQw3FHck9jXeVmzng
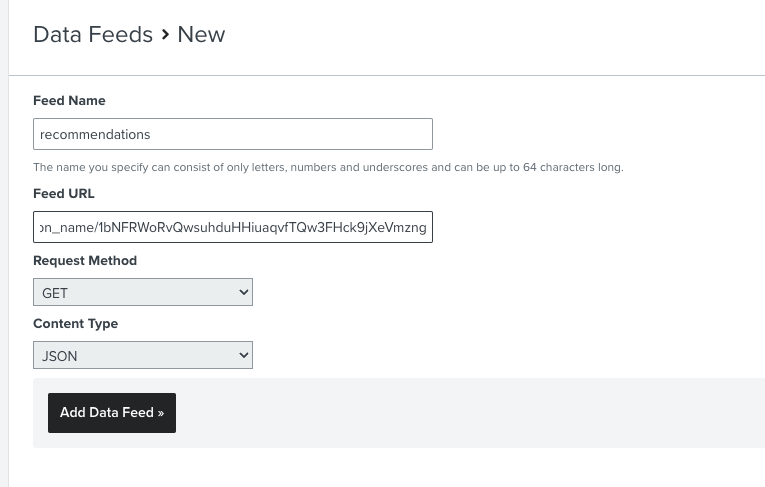
All other fields can be left as is
Save the feed by clicking ‘Add Data Feed’.
5. Create the product block
Similar to section 2 above, you can now utilize this feed to push data into your custom product block.
This section will perform a catalog lookup on the ID from the Google Sheet, and then provide you with the content to display to your requirements.
Drag in a section block.
Now, instead of using the product feed as a source, you can replace this with the Web Feed defined in step 4 above, for example: ‘feeds.recommendations|slice:3’.
Continue to build out your block as required.
Conclusion — Extend it!
Now you have the basics, and you can extend this custom block. Some examples:
- Add multiple feeds in Klaviyo by changing the SheetID in each new feed. This can provide you with different recommendation feeds per region, product type, section, etc.
- Add additional product data from the product metadata object. For example, sale prices, alternative currencies, etc.
- Get creative and build a full custom product catalog with multiple translations and prices for different regions.
This is only the beginning!
We hope that these solutions will inspire you to try out your own ideas to promote conscious consumerism.
We’d love to see what you build, so please share your flows with us, and perhaps submit them for an Klaviyo award!
Best,
Brian