Solved

Abandoned cart flow: emails not being sent when I test the flow


Userlevel 1
Badge +2

Hi all - can someone help me to work out if I have set up my abandoned cart flow properly? I have been testing it and haven’t received any abandoned cart emails after 4 hours.

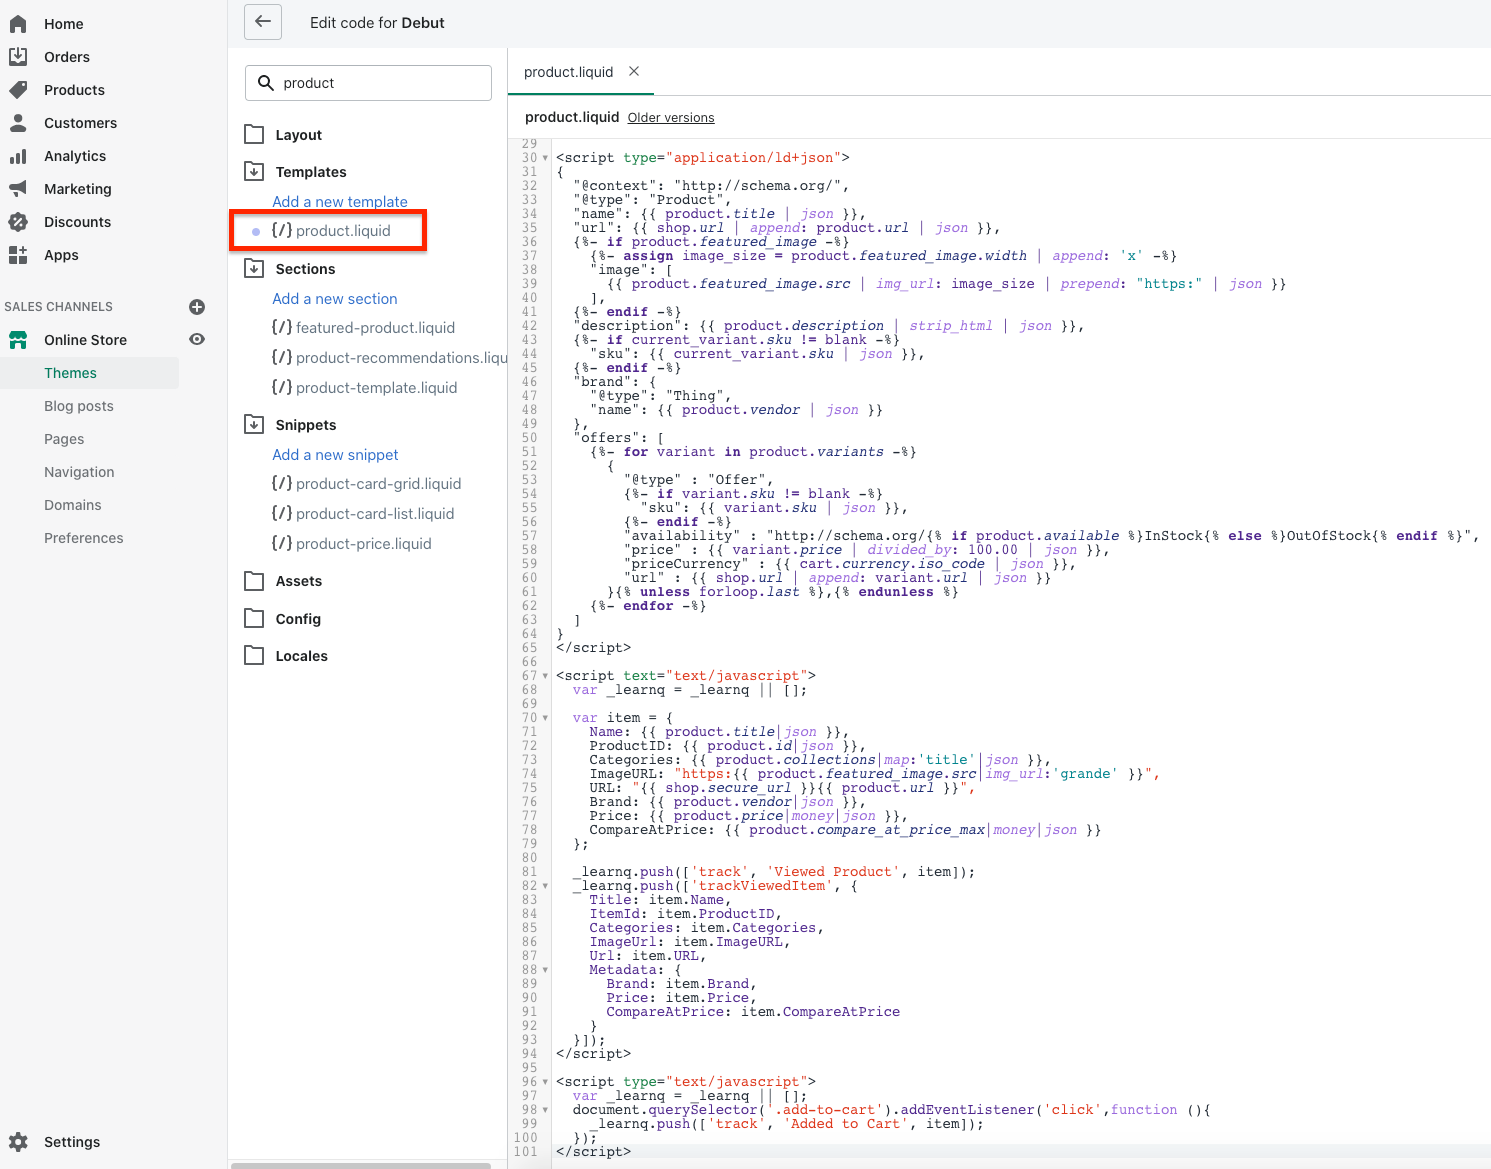
My website is a Shopify site.

  • I placed a product in the cart and then left the website
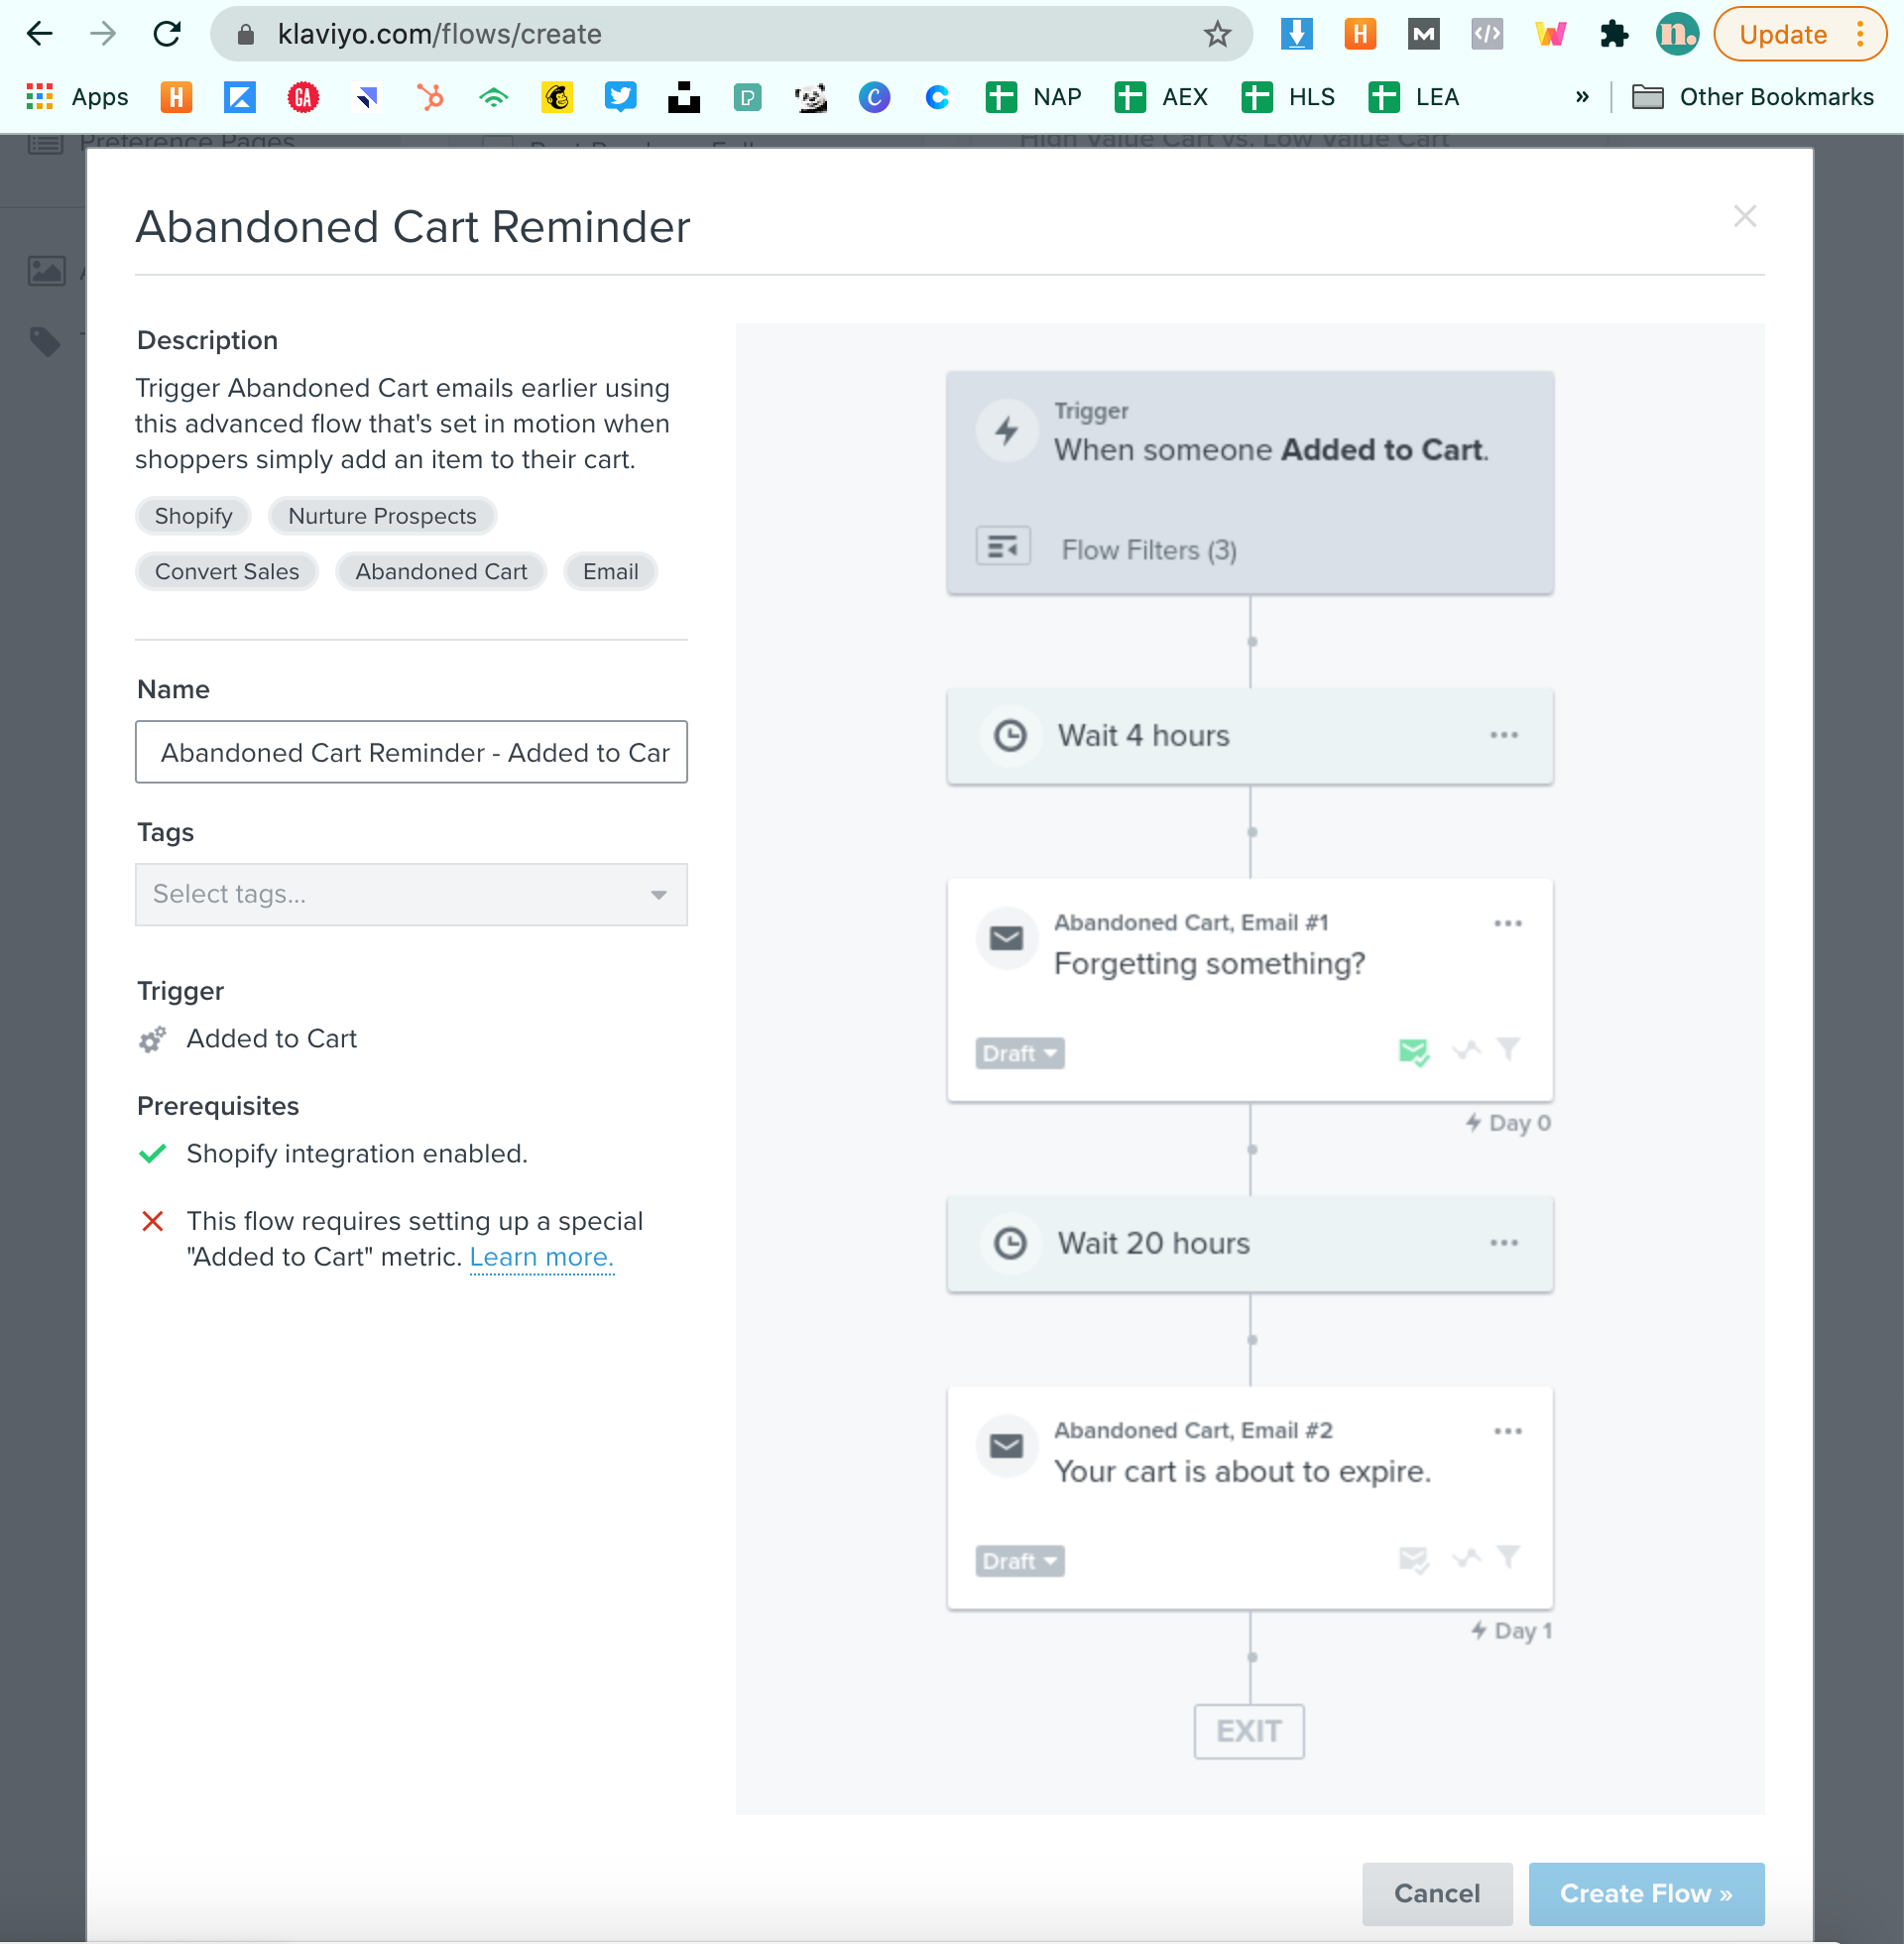
  • 4 hours later (which is the timing of the delay) I didn’t receive any abandoned cart email, even though I just used the default flow that was in Klaviyo.
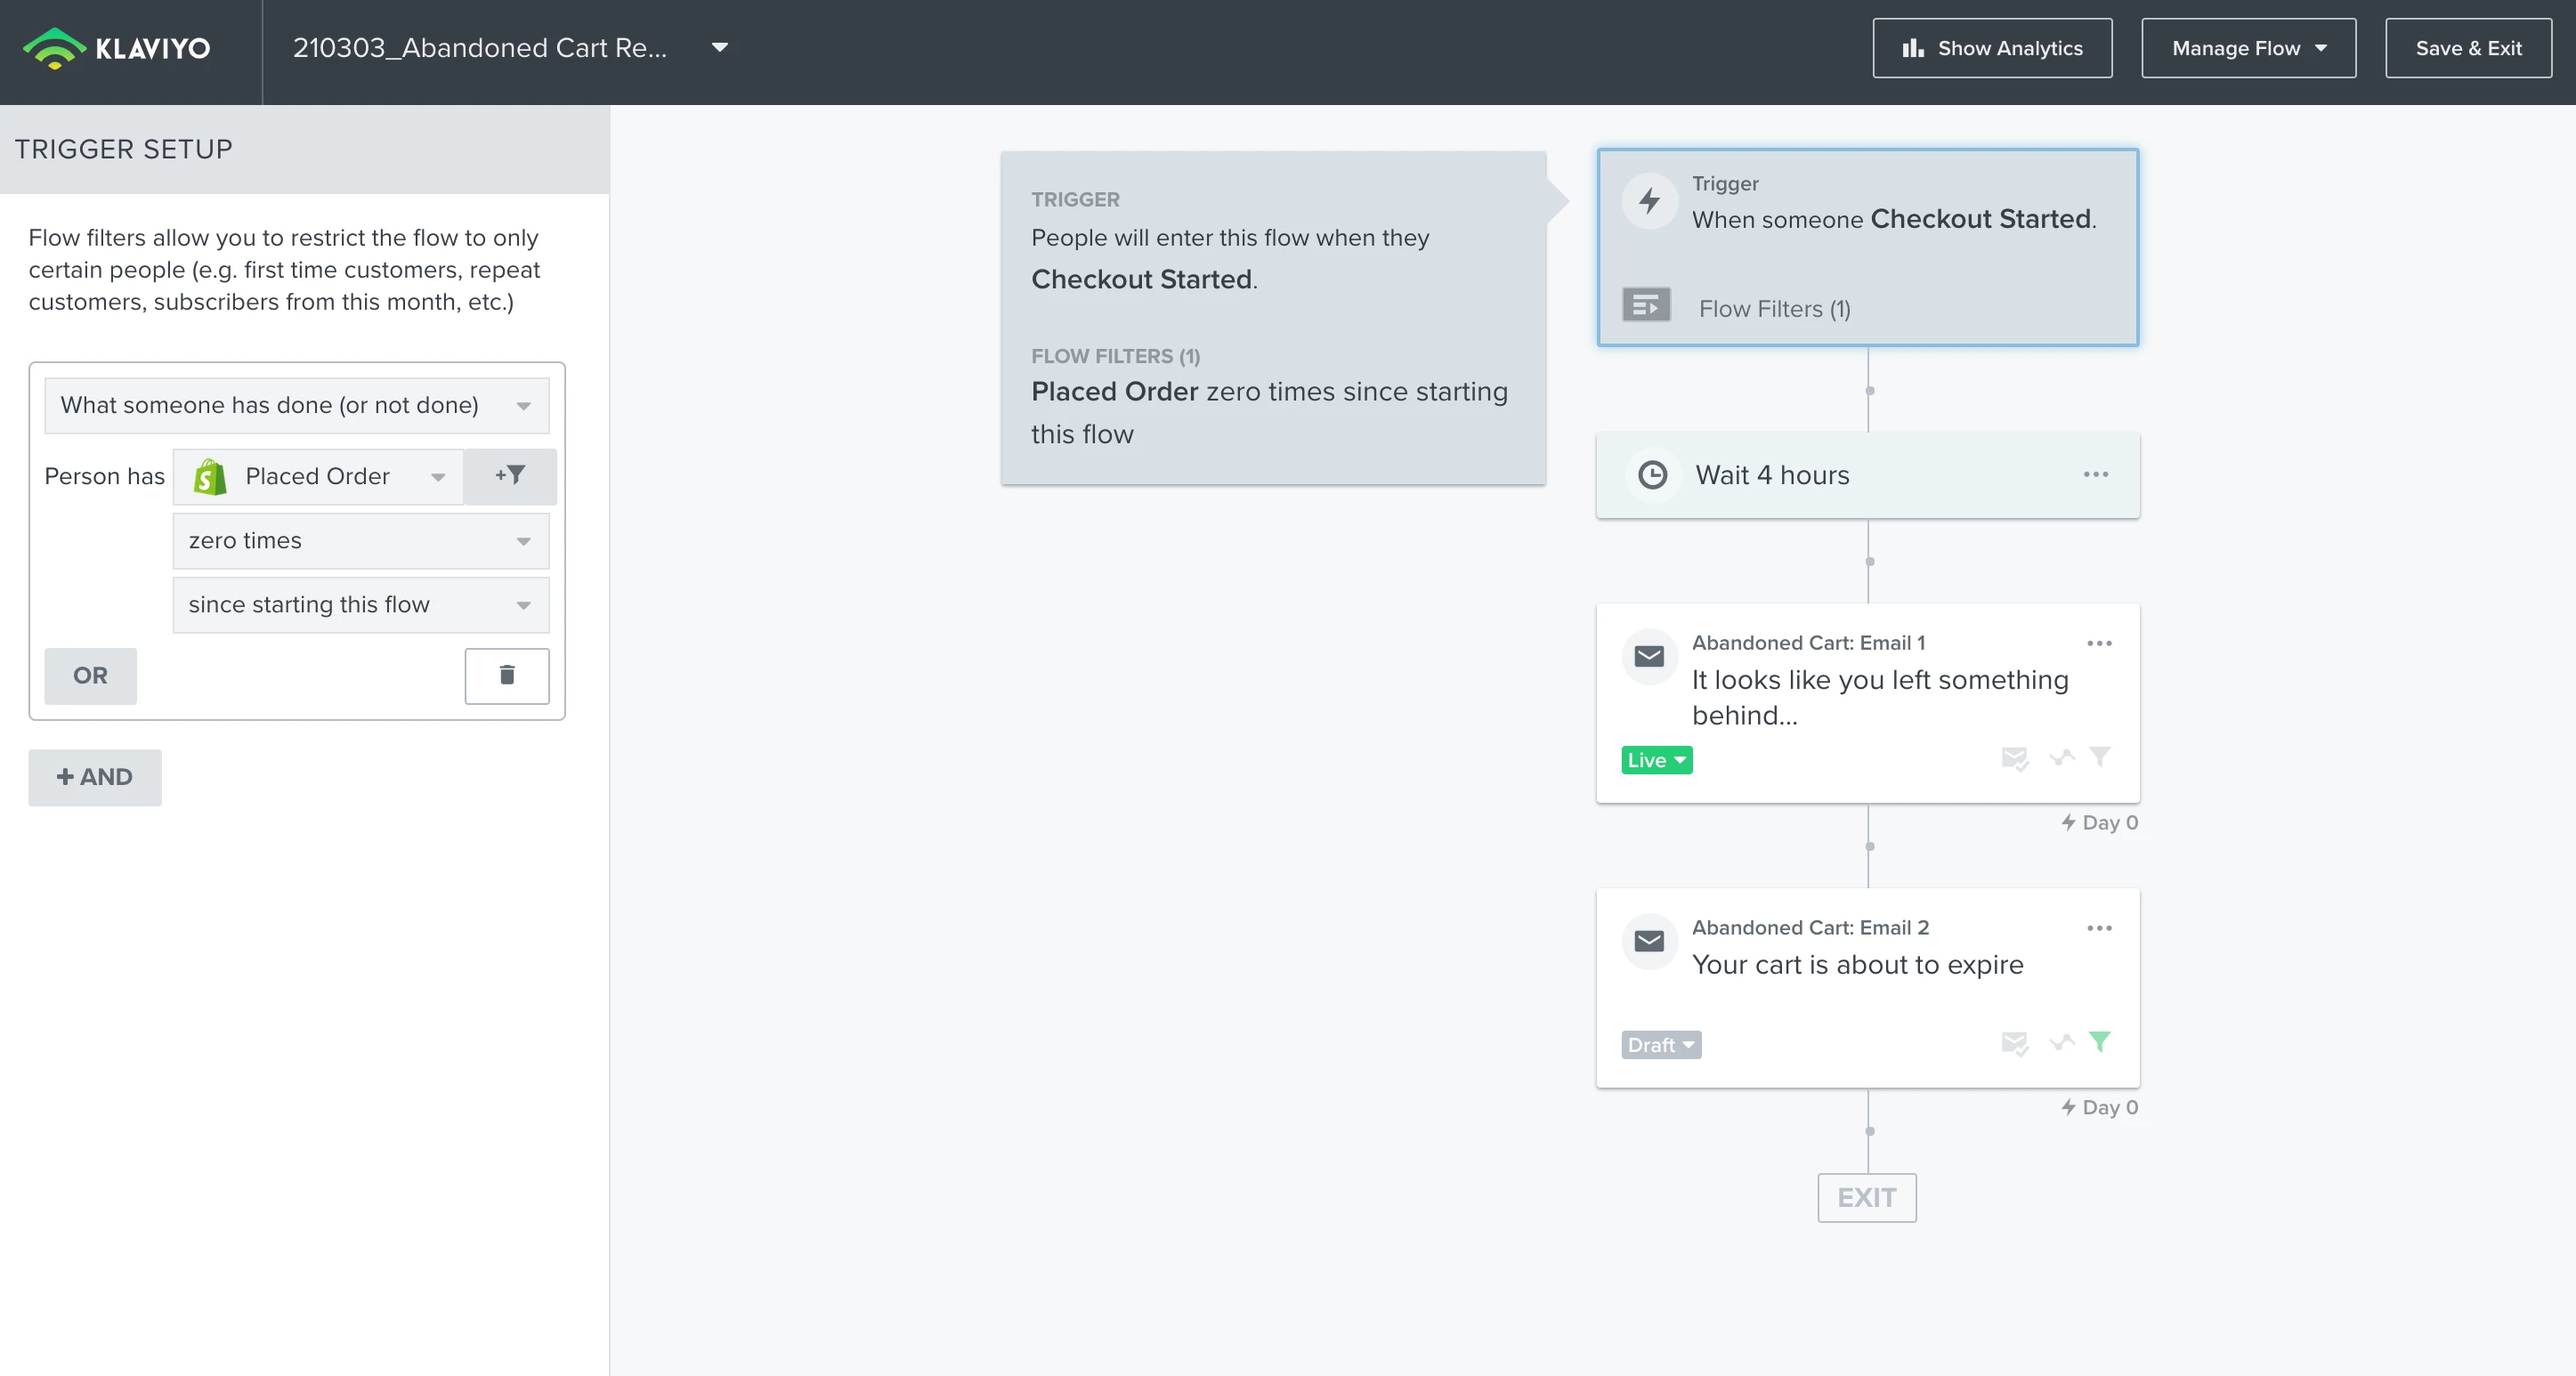
  • I set the filter to ‘placed order zero times since starting flow’.
  • Then it should send the “It looks like you left something behind” email.
  • (The 2nd email “Your cart is about to expire” I have intentionally left as a draft as I want to test just sending one abandoned email first)

I thought maybe the reason I wasn’t receiving any abandoned cart email might be because I wasn’t logged in to the Shopify site. But I tried it by logging in and I still didn’t receive anything. 

Thank you all for any help you can provide!


Cheers


icon

Best answer by elisegaines 30 March 2021, 15:55

View original

16 replies

Userlevel 5
Badge +25

Hi @NomiaMarketing! The Started Checkout event (which triggers this flow) is triggered when you proceed past the first page of checkout. Simply adding an item to your cart without going through that first page of checkout won’t trigger the flow, since that is where Klaviyo is able to access the customer’s email address. 

There’s a bit more info available here: https://help.klaviyo.com/hc/en-us/articles/115005080447-Reviewing-Your-Shopify-Data#checkout-started2 


If you’d like to send a flow message after someone adds an item to their cart, you can set up the Add to Cart event + a Abandoned Checkout flow: https://help.klaviyo.com/hc/en-us/articles/115001396711-How-to-Create-a-Custom-Added-to-Cart-Event-for-Shopify 

Userlevel 1
Badge +2

Thank you so much for your help @elisegaines!

I’ve gone through the steps in this article: https://help.klaviyo.com/hc/en-us/articles/115001396711-How-to-Create-a-Custom-Added-to-Cart-Event-for-Shopify 

I added the tracking code to my website (and made sure my website’s add to cart button ID matches the tracking code).

However, when I use Klaviyo’s Abandoned Cart flow template (the one with the Add to Cart trigger), there is a red X next to “This flow requires setting up a special "Added to Cart" metric.” - it won’t let me Create the flow.

How can I configure the Added to Cart Trigger properly so I can set this flow up?

Thanks for your help!


Userlevel 7
Badge +60

Hey @NomiaMarketing,

Building on what @elisegaines had highlighted, if you had recently applied the Add to Cart code to your website, but no one gone through and triggered this event; you may see this error when creating the flow. This is because Klaviyo hasn’t yet recognized an event within your account that meets this flow condition; in this case, an Add to Cart event. 


To resolve this, if there havn’t already been anyone that has triggered this event yet; you can cookie your own browser and add a product to your cart to trigger this Add to Cart event for your test profile. This would record the event, allowing Klaviyo to recognize it and clear the error you see when attempting to create your flow. 

You can cookie your own browser with your desired email by following these steps:

  1. Navigate to your website/homepage in an incognito browser
  2. Add the following to the end of your store URL, replacing example@gmail.com with your email address:
    ?utm_email=example@gmail.com
    • Example URL: wwww.ExampleWebsite.com/?utm_email=example@gmail.com
  3. After you reload the page your browser should be cookied with your desired email address, which would create a profile within Klaviyo
  4. Search in Klaviyo for your email address

I would also take a look at the following forum post where @dov.derin has highlighted some instructions on installing and using the Add to Cart code as well: 

Hope this helps!
David

Userlevel 1
Badge +2

Thank you @david.to for your help! This worked :)

Badge +1

Hello, I am having the same issue, I did the integration, web tracking and pasted also the add to cart code, and tried to use email address and added to cart and still does not let me to create the “add to cart trigger”, telling me there “This flow requires setting up a special "Added to Cart" metric”. How can I solve this issue. Thank you!

Userlevel 1
Badge +2

Hi @gymopath - it did take a day or two for Klaviyo to recognise the addition of the code. It was a little while ago but I think I just left it overnight and then it worked the next day.

Userlevel 7
Badge +61

Thanks @gymopath for your question.

Yes, @NomiaMarketing is correct!  

Hi @gymopath - it did take a day or two for Klaviyo to recognise the addition of the code. It was a little while ago but I think I just left it overnight and then it worked the next day.


It can take some time before the call-out in the flow builder “recognizes” that the snippet has been added.

Additionally, the best way to “tell” if the Added to Cart snippet has been acknowledged by Klaviyo is to navigate to the Analytics page under Metrics. You should see “Added to Cart” there immediately after adding an item to your cart. As long as the metrics is there, you can go ahead and create the flow, even if it still says “flow requires setting up the Added to Cart metric” and it will work as expected.


Badge +1

Hello @NomiaMarketing, and @dov.derin, thanks for the reply. Apparently “Add to Cart” is not in the metrics for some reason, although did the coding and everything for integration and for add to cart and all that as instructed above in the forum. 

Userlevel 7
Badge +61

Hi @gymopath,

Thanks for your follow-up reply.

Have you had a chance to review my last comment in the bottom of the following thread?


I outline some steps for troubleshooting Added to Cart. 

Let me know if you’re still having trouble after reviewing.

Badge +1

Hello @dov.derin, this code should be added in the product-template.liquid, in the asset folder or in the snippet folder?


Userlevel 7
Badge +60

Hello @gymopath,

The code used for the Add to Cart function should typically be installed in the Product.Liquid template file. 

You should be able to locate this file by searching “product” within your theme files and clicking into the resulting (/) product.liquid file. 

Once you’ve located this file, the code should be installed directly underneath your Viewed Product. Here’s a refresher on how to install the Add to Cart code should you need it: How to Create a Custom "Added to Cart" Event for Shopify

In the event you are using a customized theme, you’ll want to locate and install the code in the custom theme file that correlates to Shopify’s default product.liquid file. Theme developers are not required to follow some of the basic guidelines used by Shopify, such as their theme file naming convention. Should you need help with this, we would recommend either reaching out to the theme developer in locating the correcting file or reaching out to one of our many Klaviyo partners. You can find more details on this process and the benefits of pursuing a Klaviyo partner in the post below:

https://community.klaviyo.com/job-board-55/tips-for-hiring-a-klaviyo-partner-770

Hope this helps!

-David

Badge +1

Hello @david.to, my theme is motion and yes the code is added in the right place, but still there is to add to cart in metrics, I tried now the example email and adding to cart, for adding to cart to appear in metrics or do I need to wait couple of days now?

If nothing works ill reach out to the klaviyo partner for further help.

Userlevel 7
Badge +60

Hey @gymopath,

If I’m not mistaken, I believe the Motion theme may actually be using the ID option for their buttons as opposed to a Class Notion. I would recommend ensuring that you have formatted the Add to Cart code to correctly align with your theme’s button ID as detailed in the How to Create a Custom "Added to Cart" Event for Shopify article. 

Here’s a copy of the base code if your theme button is using an ID as opposed to a Class Notion should you need it: 

<script type="text/javascript">
var _learnq = _learnq || [];
document.getElementById("AddToCart").addEventListener('click',function (){
_learnq.push(['track', 'Added to Cart', item]);
});
</script>

As highlighted in the article and the Community Post that Dov had mentioned earlier, you’ll want to make sure that the base code provided above is formatted accurately to be referencing your theme’s button’s ID. You’ll want to format the above default code to replace the “AddToCart” to match whatever ID your theme’s button is using. 

David

Badge +1

@david.to @elisegaines 

I’m struggling a bit as all of the Klaviyo tutorials show an edit code screen where all of the product page code is in a product.liquid file. But my product.liquid is composed of 3 sections:

{% section 'product-template' %}
{% section 'product-recommendations' %}
{% section 'recently-viewed-products' %}


So i would guess I need to add the add to cart to the recently-viewed-products.liquid but the code there doesn’t match the set up instructions.

Any suggestions?  

thank you! lizzy

Badge +1

<I’m not able to delete my reply above>


I’ve fixed this (it *is* in product.liquid, even though that file doesn’t look like the one in the help section.)


Userlevel 7
Badge +60

Hey @lkmz,

Thanks for that update!

I’m sure your comment will help other Community members who may be confused about this as well! 

Based on the theme you are using, your theme files such as the product.liquid file may not match the one found in the Klaviyo help center articles.

Thanks for being a member of the Klaviyo Community!

David

Reply