Issue. We had our ad agency change the wording of one of our items in Shopify without informing us, resulting in a flow trigger not firing and 53 of our prospects not entering a sales flow.
I am trying to figure out how to get these past profiles into that flow.
I have created a segment with the 53 profiles in it. Then I cloned the flow and attempted to have that segment go into the top of the flow, but for the life of me, I can't find a way/ trigger to initiate that action.
Any advice welcome
Page 1 / 1
Hi @simonb
Thank you for posting your question in the community!
I am sorry to hear about the confusion here and I hope I can help you get the 53 contacts into your sales flow. Everything you’ve done up to this point including cloning the flow with the intent to retrigger those contacts into the flow.
However, if you configured the trigger of the flow based on a segment of those 53 profiles, the trigger is when someone is added to the segment once the flow is live. So, in this case, you are unable to trigger the existing contacts in the segment into the flow.
As such, I would recommend replicating the process you took and clone the flow one more time. However, this time, create a new list in Klaviyo, but do not upload any contacts to that list just yet. When you clone the flow again, you’ll set it up using the empty list you just created so the flow is a List-based flow. Once you have the list assigned, then active the messages in the flow.
Because list-based and segment-based flows are triggered when a contact is added to them. So, with your flow associated with the list, and activated, you can export the 53 contacts from your segment, and then import them into the list you create. Upon import, they will be triggered into the flow.
I hope this helps! If you have any additional questions, please don’t hesitate to let me know.
@In the Inbox
Hi Bryan
Thanks for the info.
I have followed your steps - and created a list - however when i go to set up a trigger filter - choose list - equals - Dimension value - the list i created does not appear in the drop down for selection.
Why would this be .
Do i have to type the name of the list in.
Cheers
Hi @simonb
Thanks for the reply, and sorry for the confusion. I think I understand what might be tripping you up here.
First, to make this work, you will be using a different flow trigger vs. a trigger filter. In this case, the flow trigger is a List-Based Trigger.
A Trigger Filter is only going to include data provided by the event that is configured as the trigger for the flow. If you were using a Shopify Event (ie. Placed Order) for the flow trigger, then you will not see any list option as a list is not data included in the Placed Order event.
--
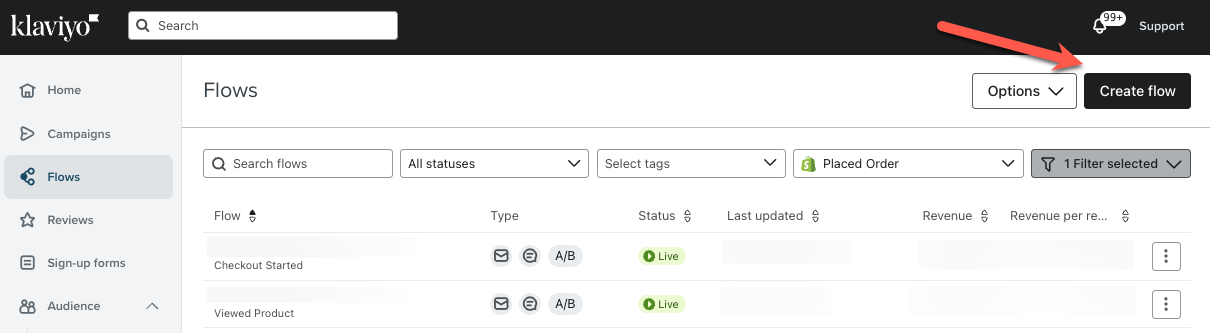
After realizing my misstep in my earlier recommendation, rather than cloning the existing flow, you need to recreate the flow from scratch, but configure the flow using a List Flow Trigger.
Here’s how:
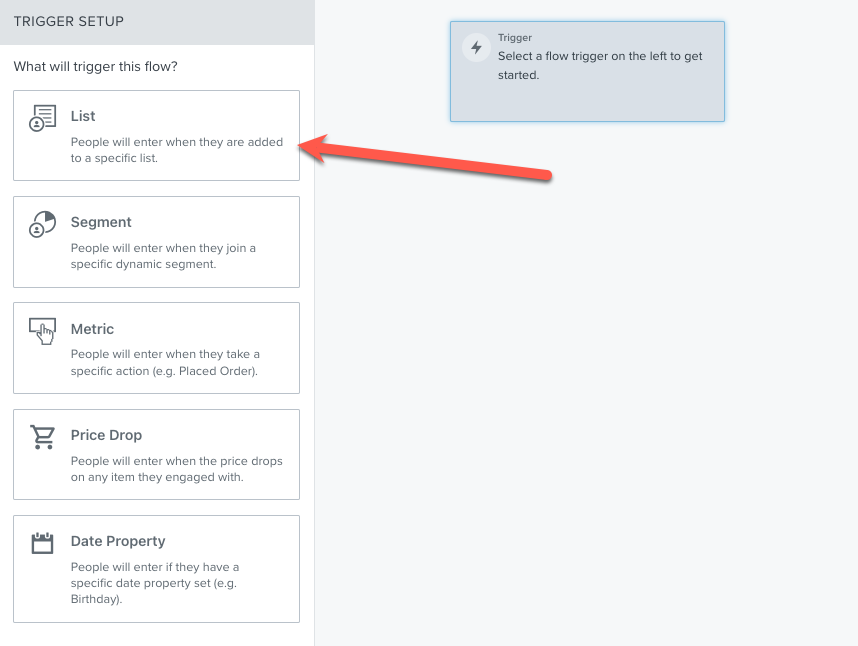
When you’ve created your new flow, the first step is to select the trigger from the left navigation. For this example, you’d select List.
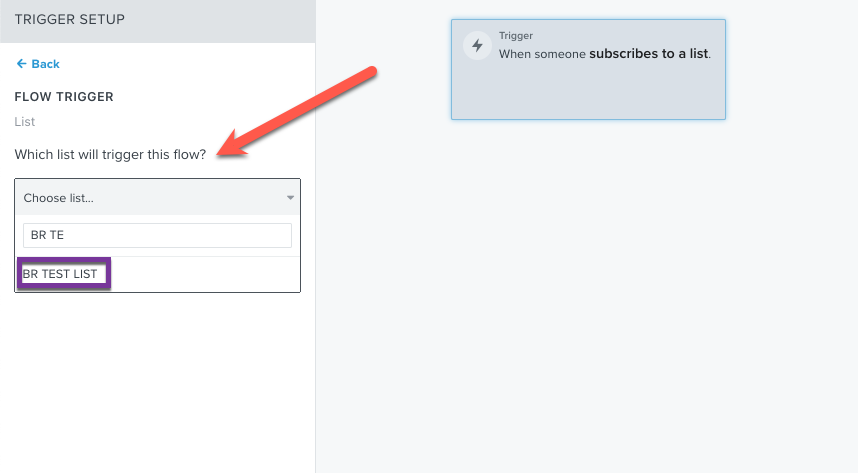
When you’ve selected the list trigger, you’re then prompted to select which list in your account you want to use for the trigger.
Now, you can add in the messages, conditional splits, and wait steps for your flow.
--
As I mentioned before, you do not want to add your contacts to your new list until you have your flow set up and active. When you use a list or segment trigger for a flow, users are only entered into your flow when they are added to the list/segment.
So…
Your steps for this are as follows:
Create Your New List
Update the list settings for Single Opt-in Consent, click save
DO NOT UPLOAD ANY CONTACTS TO THE LIST AT THIS POINT
Create Your New Flow, as noted above, use the list trigger and assign your new list as the trigger
Set up the flow messages, conditional splits, and wait steps
Activate all messages in the flow (set the status to live)
Manually upload your contacts to the new list you created in step 1
Once you’ve followed these steps, the contacts you upload to the list will be automatically added to the flow and you should be good!
I hope this helps clarify things more! But, if you have any additional questions, please let me know!
Good Luck.
@In the Inbox
Hi,
I have this same issue, but I’d like for the flow to include profiles dynamically. If I set up the flow as list-based, wouldn’t I have to add profiles to that list every time I want them to enter the flow? How else can this be done?
Thanks,
Hey @kiwird
Thanks for the follow up question!
Any list triggered flow will only allow a profile to move through once. Even if you were to remove the profile and add them back, the profile will not move through the flow again. If you want a profile to move through a flow every time they perform a specific action “placed order” or “viewed product” for example, you can set up a metric triggered flow based on the desired metric that will allow your customers to move through a flow multiple times.