Hi Team,
Is there a way I can split subscribers on to lists with a check box from a pop up?
EG have one sign up field but then have a check box for different lists for the person to subscribe to.
can this be done?
Thanks in advance
 +3
+3Hi Team,
Is there a way I can split subscribers on to lists with a check box from a pop up?
EG have one sign up field but then have a check box for different lists for the person to subscribe to.
can this be done?
Thanks in advance
Best answer by Brian Turcotte
Hi
Just as
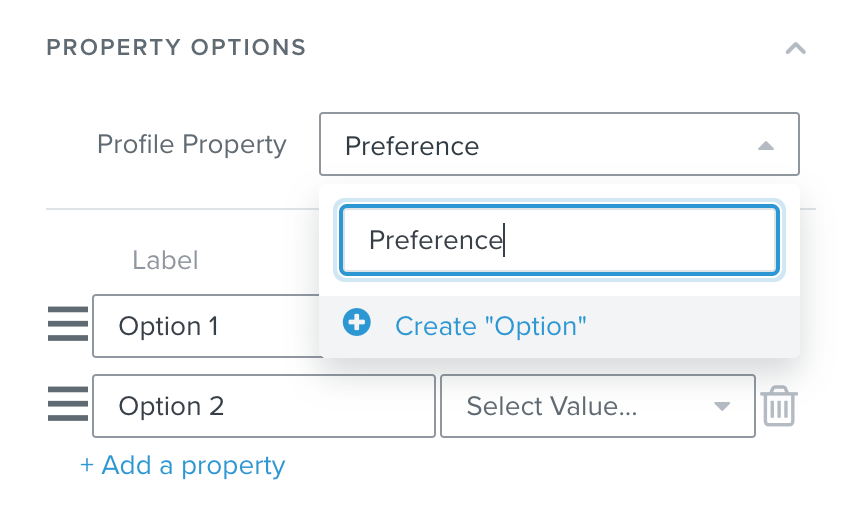
To accomplish this, add the checkbox/radio button block to your form and find the Property Options section on the left. Under Profile Property, type a name for the property you’d like to divide the Segments with, and then click Create “Option”. Now when someone fills out the form, the property will be created and assigned to their profile:

Then, label the options that will appear on the form and create the corresponding values for the property in the same manner:

For even more perspective on collecting Custom Profile Properties, check out this thread moderated by my colleague, Taylor:
Once someone fills out the form, you can create Segments instead of Lists to divide your subscribers. In the create a Segment page, create a name according to the property that the Segment is identifying, then choose the “Properties about someone” option from the Definition drop-down list. Then just find your custom property from the list and choose the correct value. (Note: the property will not appear until at least one person has selected it from a submitted form):

I hope this helps, and thank you for using the Community!
-Brian
Enter your E-mail address. We'll send you an e-mail with instructions to reset your password.