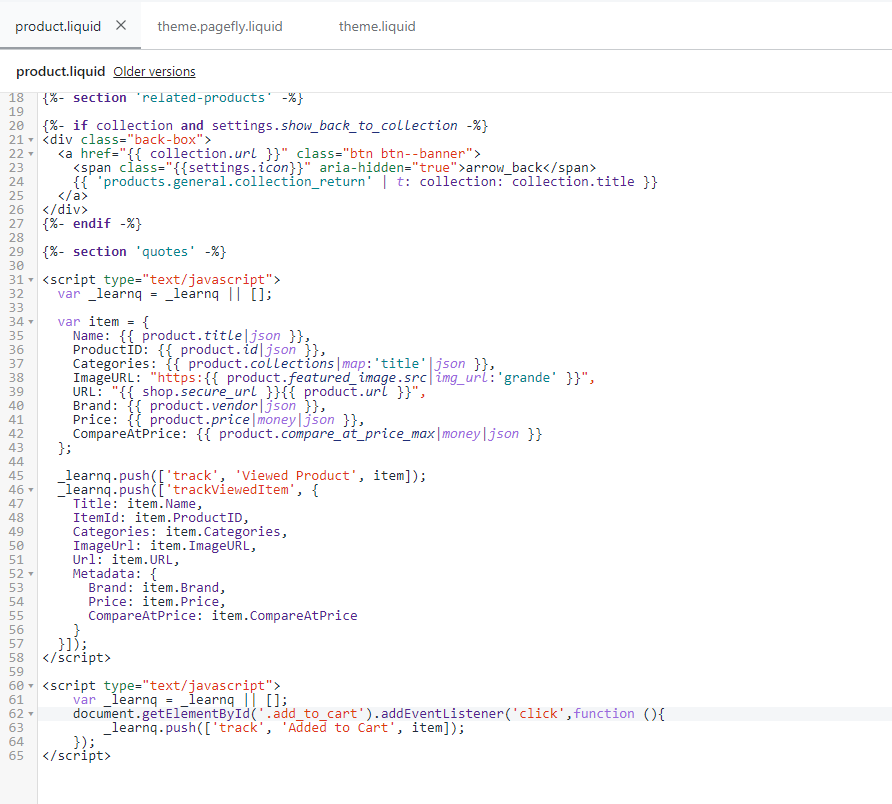
Hi there,
I have been trying to add the Add To Cart snippet into Klaviyo for 2 days now and can’t not figure out what I’m doing wrong. On my website, there isn’t any clear representation of what the ID should be. Any help is appreciated, thank you!


 +2
+2Hi there,
I have been trying to add the Add To Cart snippet into Klaviyo for 2 days now and can’t not figure out what I’m doing wrong. On my website, there isn’t any clear representation of what the ID should be. Any help is appreciated, thank you!


Best answer by David To
Hello
Thanks for sharing your question with the Klaviyo Community!
Assuming that the screenshot in blue is the code for your button, it appears your button is actually using a class notation as opposed to an ID which is why your add to cart code isn’t working.
I would recommend following the instructions found under the Alternate Code Snippet for "Add to Cart" Button without an ID subsection of the How to Create a Custom "Added to Cart" Event for Shopify article to properly implement the add to cart functionality. Since your button is using a class notation, you’ll actually need to adjust and use the below base code:
<script type="text/javascript">
  var _learnq = _learnq || [];
  var classname = document.getElementsByClassName("add-to-cart");
  var addToCart = function() {
  _learnq.push(['track', 'Added to Cart', item]);
  };   for (var i = 0; i < classname.length; i++) {
  classname[i].addEventListener('click', addToCart, false);
  }
  </script>
I’ve also included some other Community post below that may further guide you in this process:
I hope this helps!
David
Enter your E-mail address. We'll send you an e-mail with instructions to reset your password.