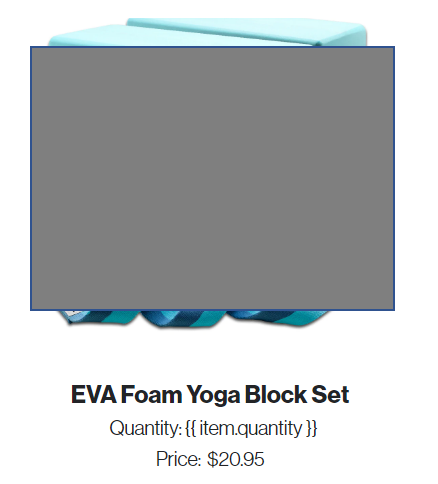
Dynamic table blocks don’t always have to show a product and its description side by side in the traditional horizontal format. In fact, you can build a dynamic table block that stacks vertical where your product details are highlighted underneath your product image!
The directions of this post are very similar to the last post - Building a dynamic table block using event data - showing how to create a dynamic event table from scratch. The only difference here, is the image will be added within the text portion of the table, through the image button. So, the directions will be the same until the last paragraph where I discuss how to add in an image to the text.
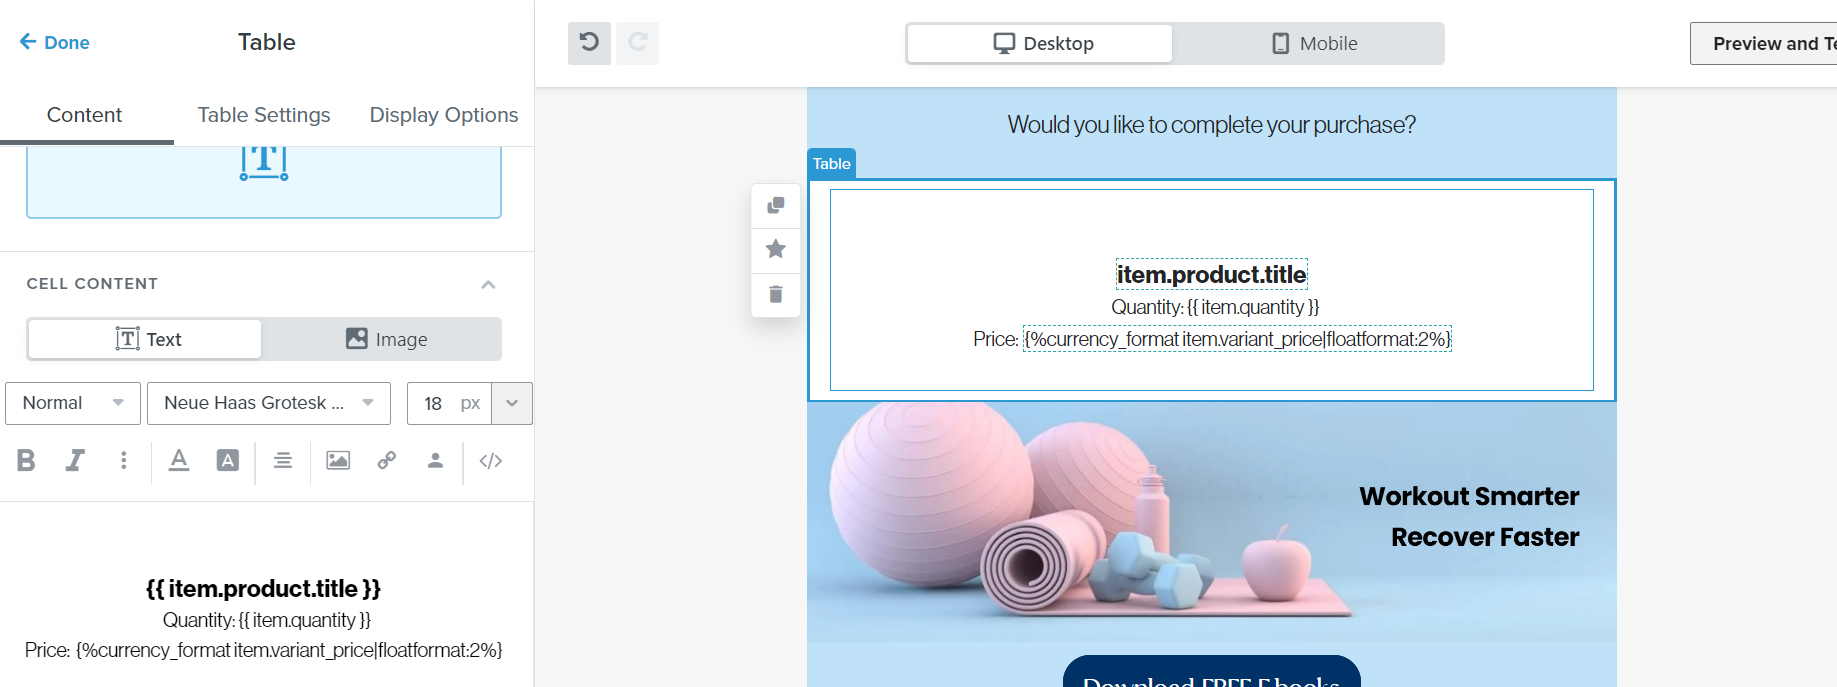
Dynamic event data will only show when the email is inside of an event based flow (abandoned cart, etc). For this example, I will be talking about abandoned cart, but this process can be used with other event triggers as well. This data shows information on what the customer did when on your website. In a flow email, add in a table block. Under table settings, turn to Dynamic. Go to preview tool for started checkout, find the repeating beginning variable for each item. IE: for price, name, quantity each of these begin with ‘event.extra.line_items’. This repeating string will be used for the row collection under table settings. Add in just the repeating string for row collection, nothing else. So, event.extra.line_items under row collection. Row alias can be anything you want, this one word will represent the whole ‘event.extra.line_items’ string. I suggest adding in ‘item’ for row alias. So, everytime ‘item’ is used in the dynamic table, it is actually loading in ‘event.extra.line_items’. We do this so that all products in someone’s abandoned cart can load in, rather than just the first item.
Now, to bring in specific product information, go to preview, copy ‘product name’ (or any variable, you want to pull in). Paste into the text portion of the dynamic table, and replace the whole first string with ‘item’, your row alias. So if the product name in the previewer is ‘event.extra.line_items.product.title’ you change this in the text block to ‘item.product.title’. Now, this will load in all product title’s in someone’s abandoned cart.
This process can be repeated for any variable in the previewer. Note: for product price, to have the price formatted as $X.XX, remember to add |floatformat:2 into the string. Ex: {{item.price|floatformat:2}}. You can pull in any information that is available in the previewer, if the information is not available in the previewer, then it cannot be pulled in because Klaviyo is not capturing it. Also please note, this example was based on Shopify. Other integrations may use a different repeating string/names for variables but the premise remains the same; find the repeating factor, use this for row collection, set a row alias, and then add the content to the table with the row alias and the individual variables.
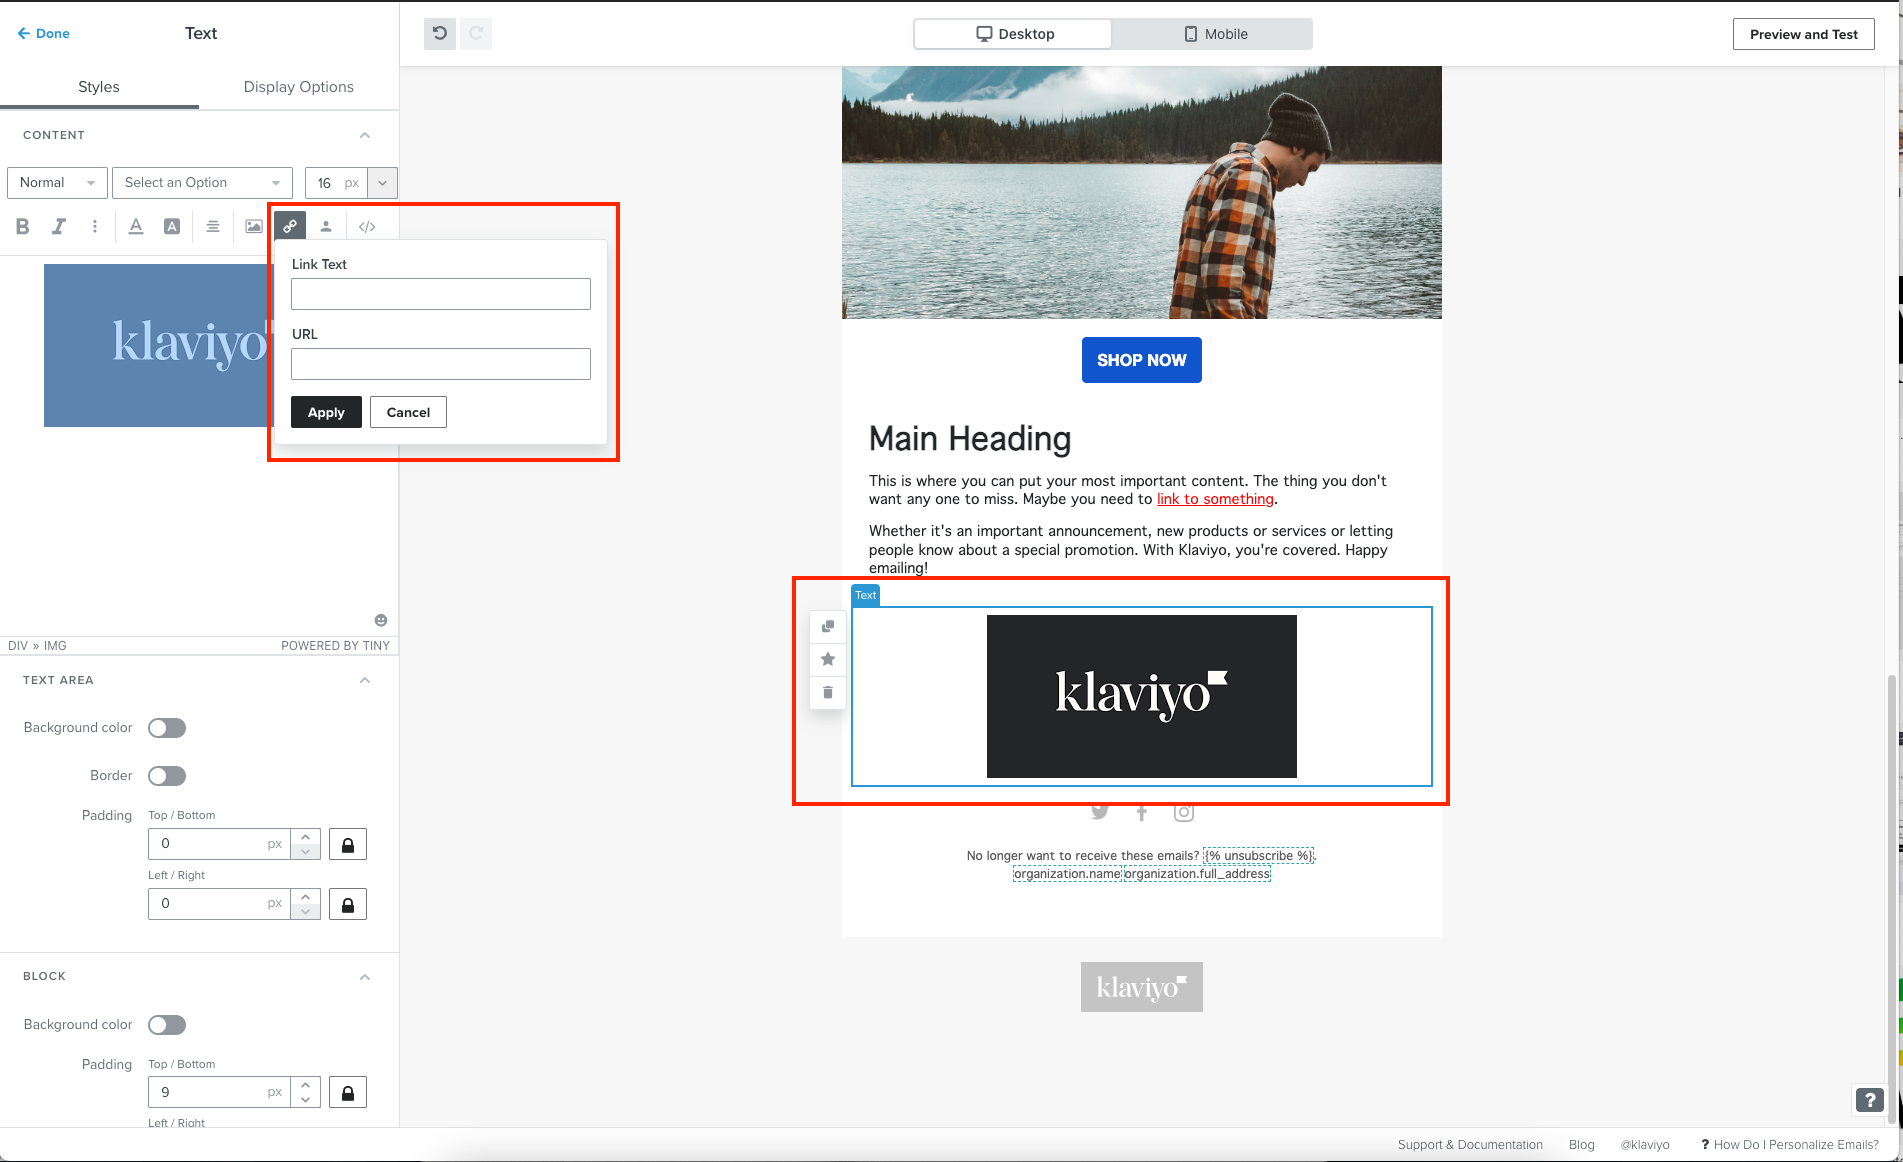
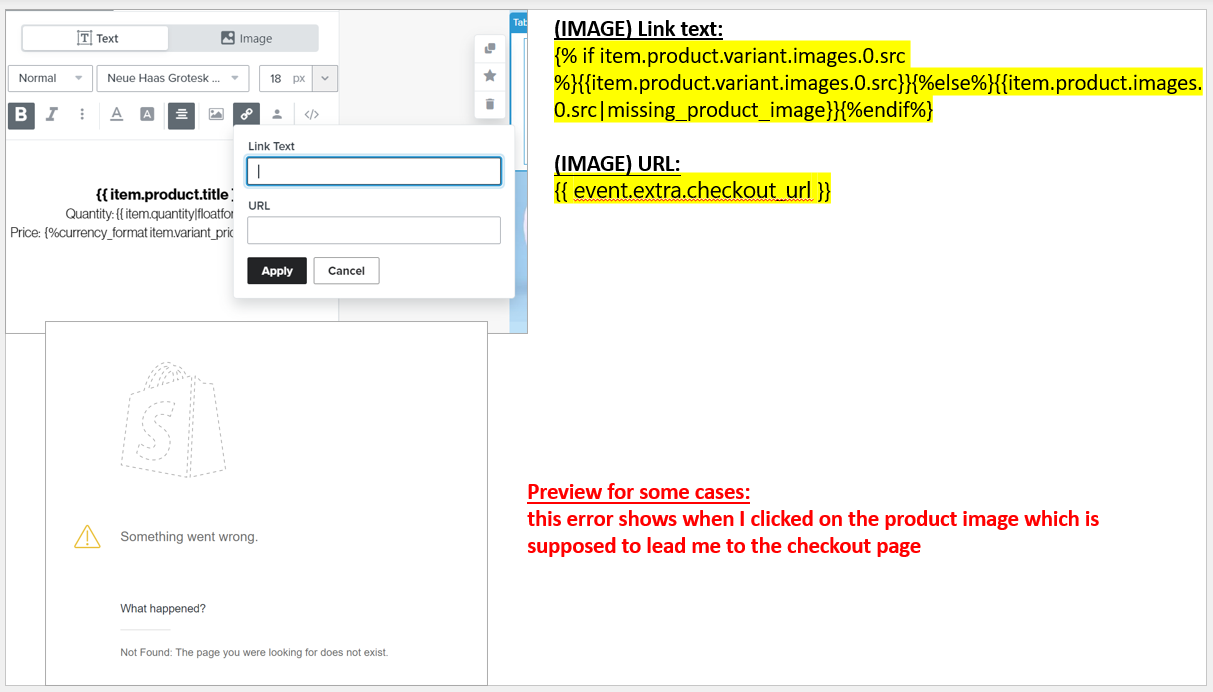
In order to have the content stacked, under Table Settings delete any columns other than one, so the dynamic table is one column. Under Content, in the one column (that should be text) select the ‘Add Image’ button, screenshot attached below. This button allows you to add an image within text. The image URL is where the image should be pulled from. If you’re using Shopify, the image source URL is: {% if item.product.variant.images.0.src %}{{ item.product.variant.images.0.src }}{% else %}{{ item.product.images.0.src|missing_product_image }}{% endif %}
You can add an image max width/height - I suggest around 200px for each.
This source URL, can be found by looking at your default abandoned cart flow, selecting into the dynamic event table, selecting the image, and copying the placeholder link. This process can be repeated by any integration, not just Shopify. Screenshots attached of this.
In conclusion, the stacked abandoned cart table is created by the usual process of creating a dynamic event table, but the last step being to make the table one column, adding an image button, and pasting in the usual placeholder link, as the image source link.