Do you send newsletter-style emails with lots of content? If so, adding a table of contents could make your message easier to navigate. A table of contents allows recipients to jump straight to the sections they’re interested in, rather than scrolling through your full message.
To add a table of contents to your emails, follow these three steps:
- Create your table of contents using anchor links
- Apply the anchors to your email content
- Test your links
Step 1: Create your table of contents
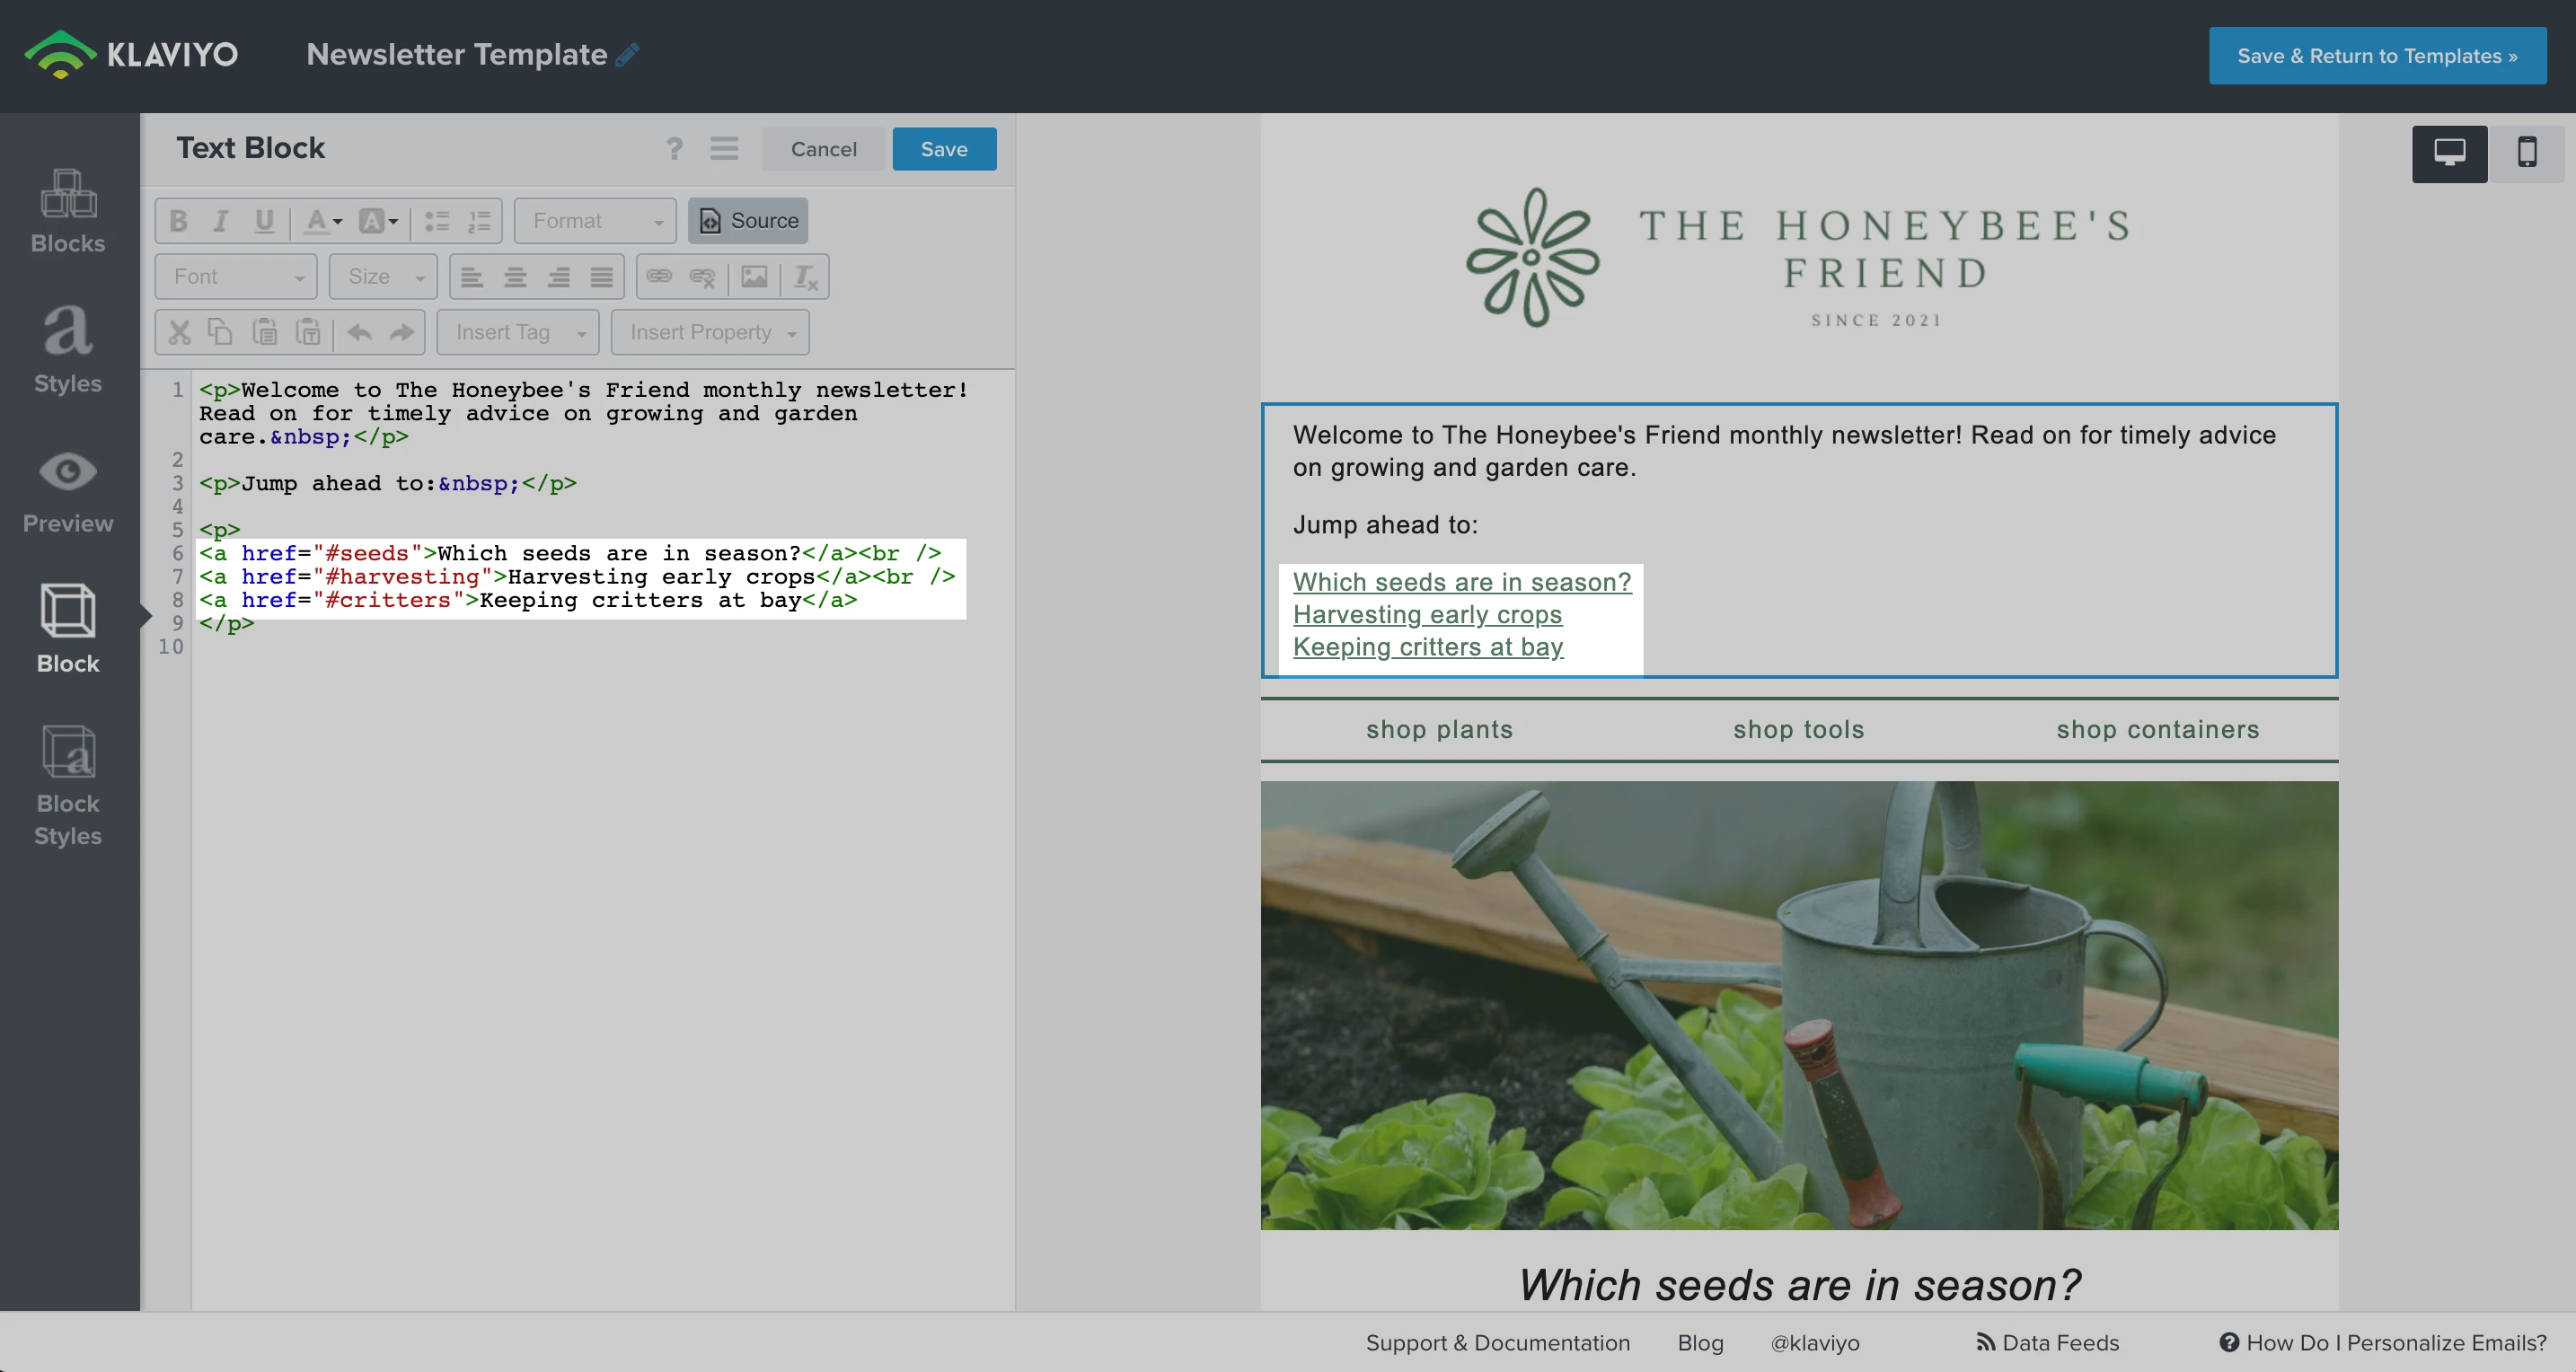
In the template editor, drag a text block into the top of your message. Add each section title to a new line.
Once you’ve added the text, click Source to open up the source code for the block. You’ll need to surround each section title with this code:
<a href="#section_one">Section 1</a>Make sure to replace “section_one” with a unique name for your section. Your recipients won’t see this unique name. It should be all one word, with no spaces (but dashes and underscores are fine). Replace “Section 1” with your first section title, then repeat the process for all other sections. In the end, your table of contents code should look like this:

Step 2: Apply anchors to your sections
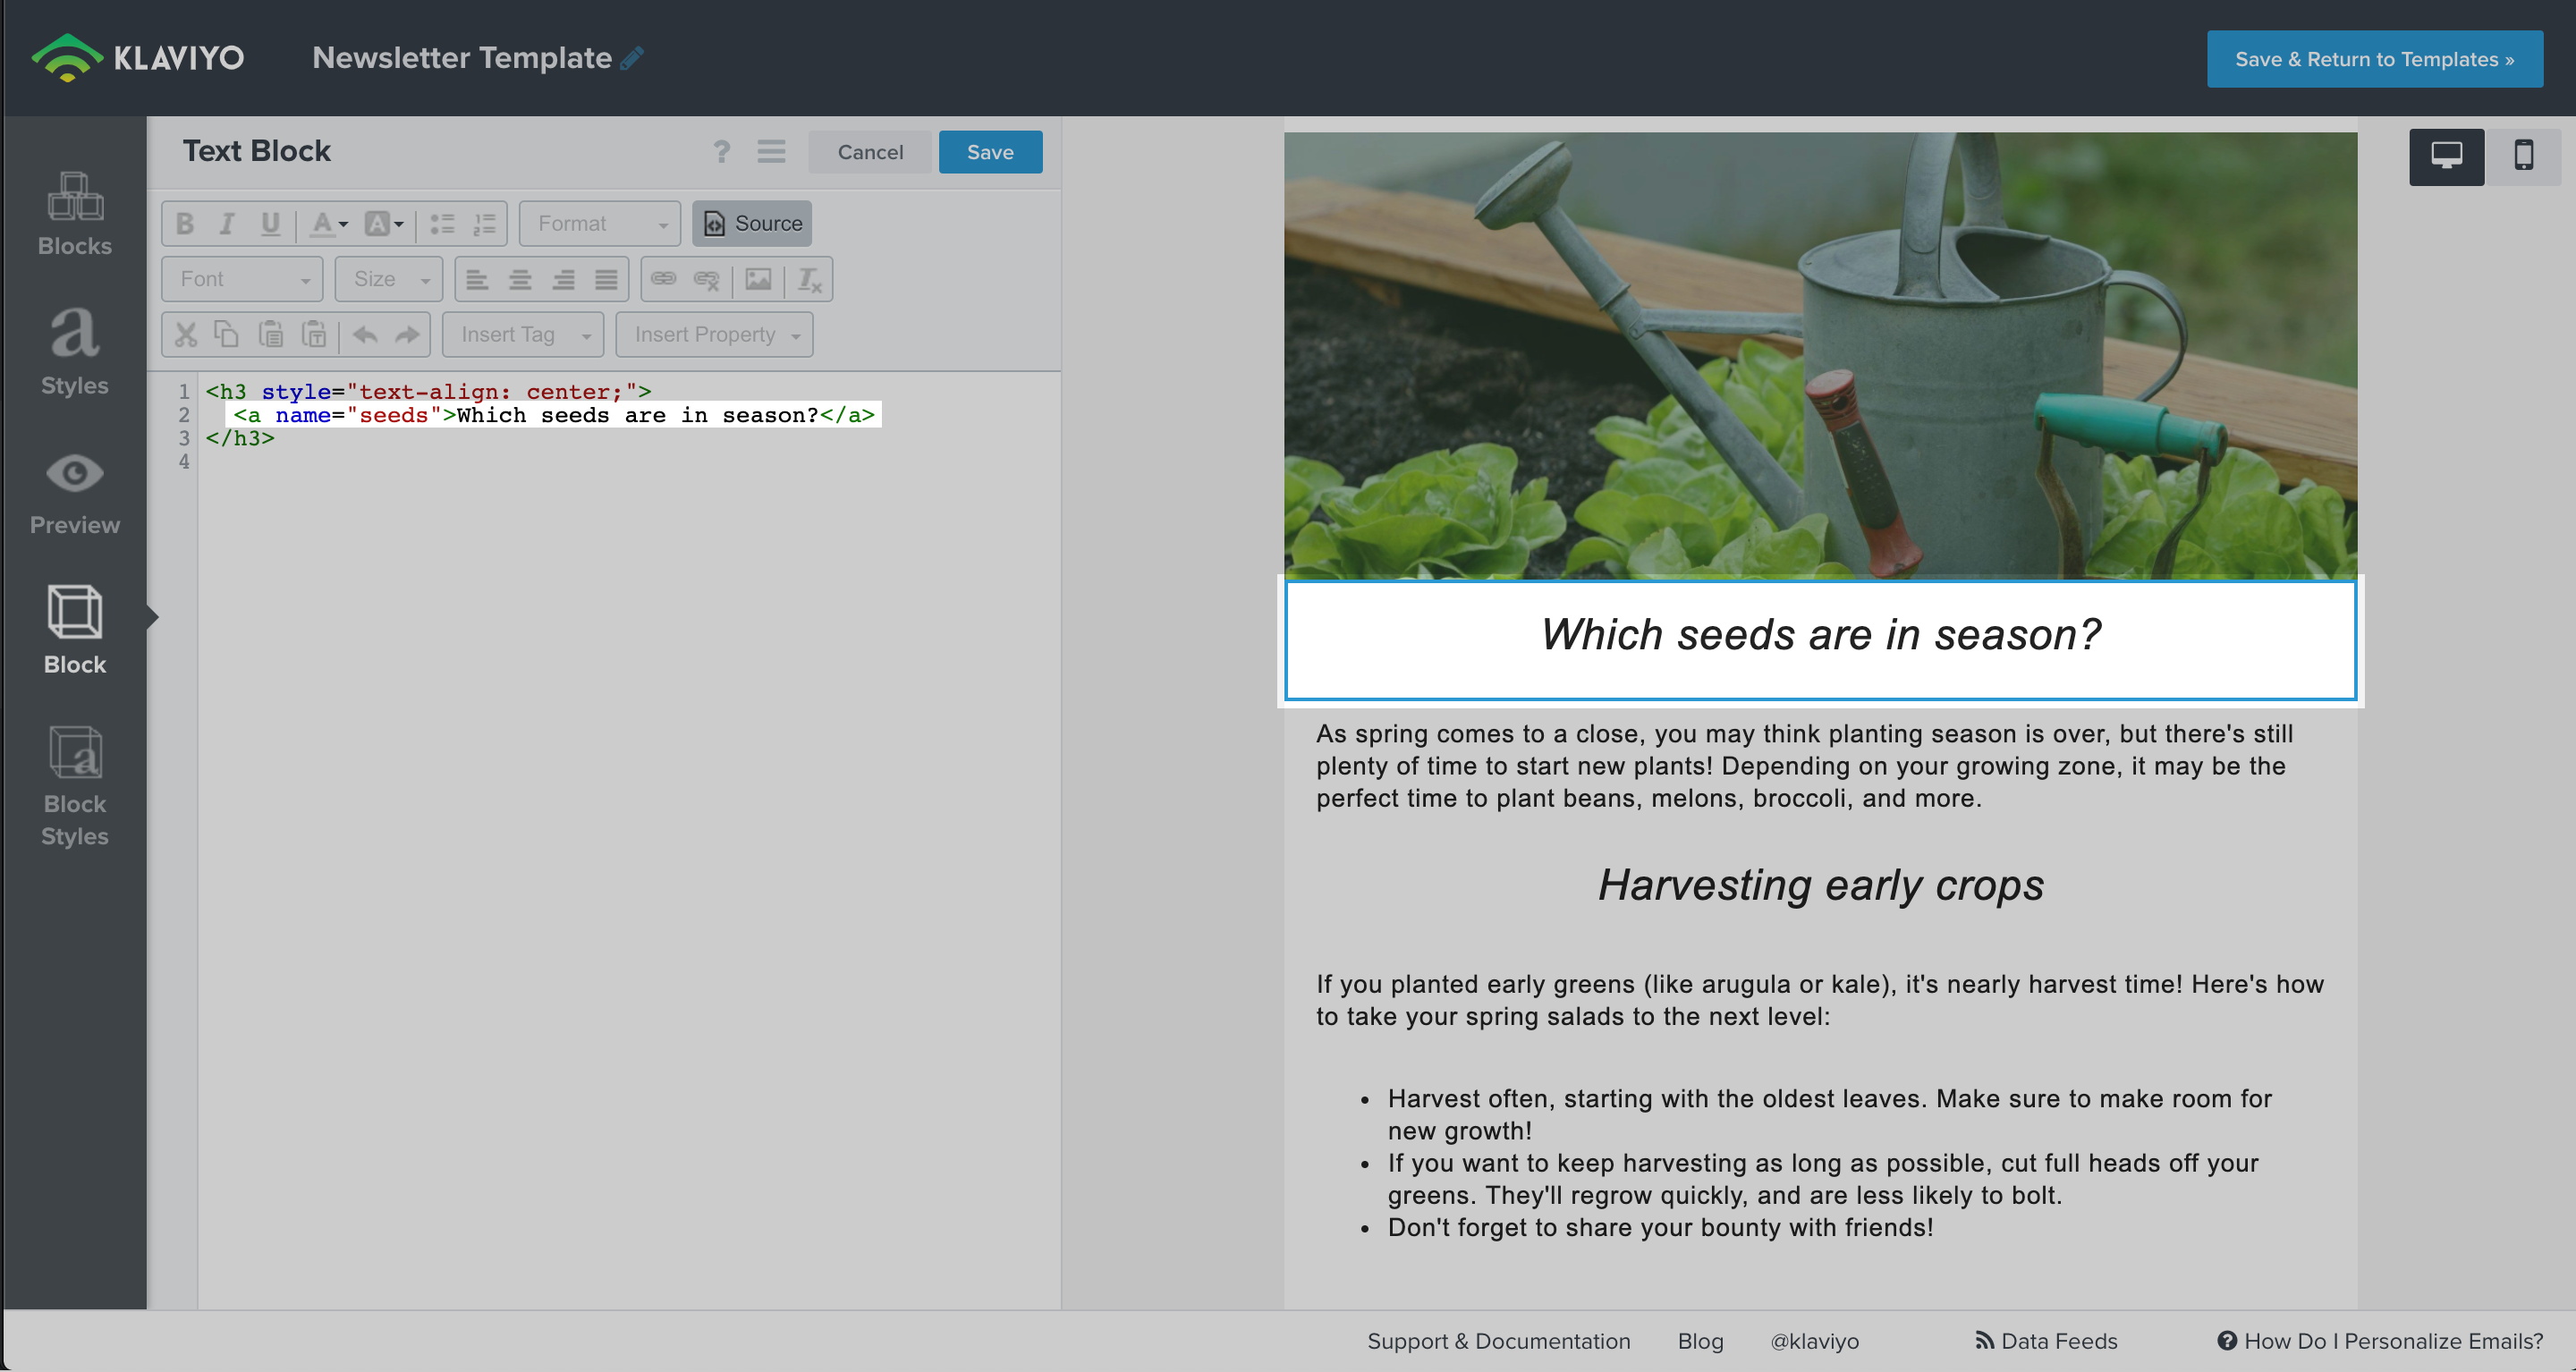
Find your first section title in the email and open its source code. Surround the title with code like this:
<a name="section_one">Section 1 Title</a>Make sure to replace “section_one” with the exact same text you used in the code above.

Repeat for all your sections! Once you’ve added them all, it’s time to test.
Step 3: Test your links
Use the preview button to send your message to yourself. If everything is set up correctly, you’ll be able to click each table of contents link to jump to the matching section. If it isn’t working, double check that you’re using the matching anchor names in the table of contents and the relevant sections.
Note that anchor links are not supported for all email apps and device types. For example, anchor links in emails will not work in the Apple Mail iOS app, Gmail’s iOS app, or Outlook for MacOS.
Pro tip:
If you don’t want your section titles to have link formatting, you can put all of the section anchor code immediately before the section title. So, instead of using this code:
<a name="section_one">Section 1 Title</a>You can use this code:
<a name="section_one"></a>Section 1 TitleNote that this only works for the section titles code. The table of contents items must be surrounded by the code tags, or they will not work.


![[Academy] Deliverability Certificate Forum|alt.badge.img](https://uploads-us-west-2.insided.com/klaviyo-en/attachment/505f2253-cde5-4365-98fd-9d894328b3e0_thumb.png)


![[Academy] SMS Strategy Certificate Forum|alt.badge.img](https://uploads-us-west-2.insided.com/klaviyo-en/attachment/2f867798-26d9-45fd-ada7-3e4271dcb460_thumb.png)
